Everything you need to know about tubeless tyre maintenance
Before you dive into the joys of tubeless tyres, there are a few things to know that could save you from a world of grief
Alex Hunt
Junior Tech Writer
Tubeless tyres can be an absolute saviour when the system works well, sealing up numerous punctures and keeping you rolling when a traditional inner tube would have you stopped at the side of the road. Unfortunately it isn't always plain sailing and there are some things Ollie Bridgewood thinks you should know that could save you hours dealing with a tubeless set-up.
There are two distinct avenues for tubeless tyre maintenance, out on the road during a ride and at home or in a workshop.
We will first take a look at troubleshooting issues during the set up process of a tubeless tyre - if you haven’t done it before it can seem overwhelming and baffling with what you need to do so here are a few things to help you out.
Rim tape
Tubeless tyres rely on a completely air-tight system, this means that the rim bed needs to be sealed with a specific rim tape. A typical cloth or non adhesive plastic rim strip will not do the job of sealing off the spoke holes and you will never get the tyre to inflate.
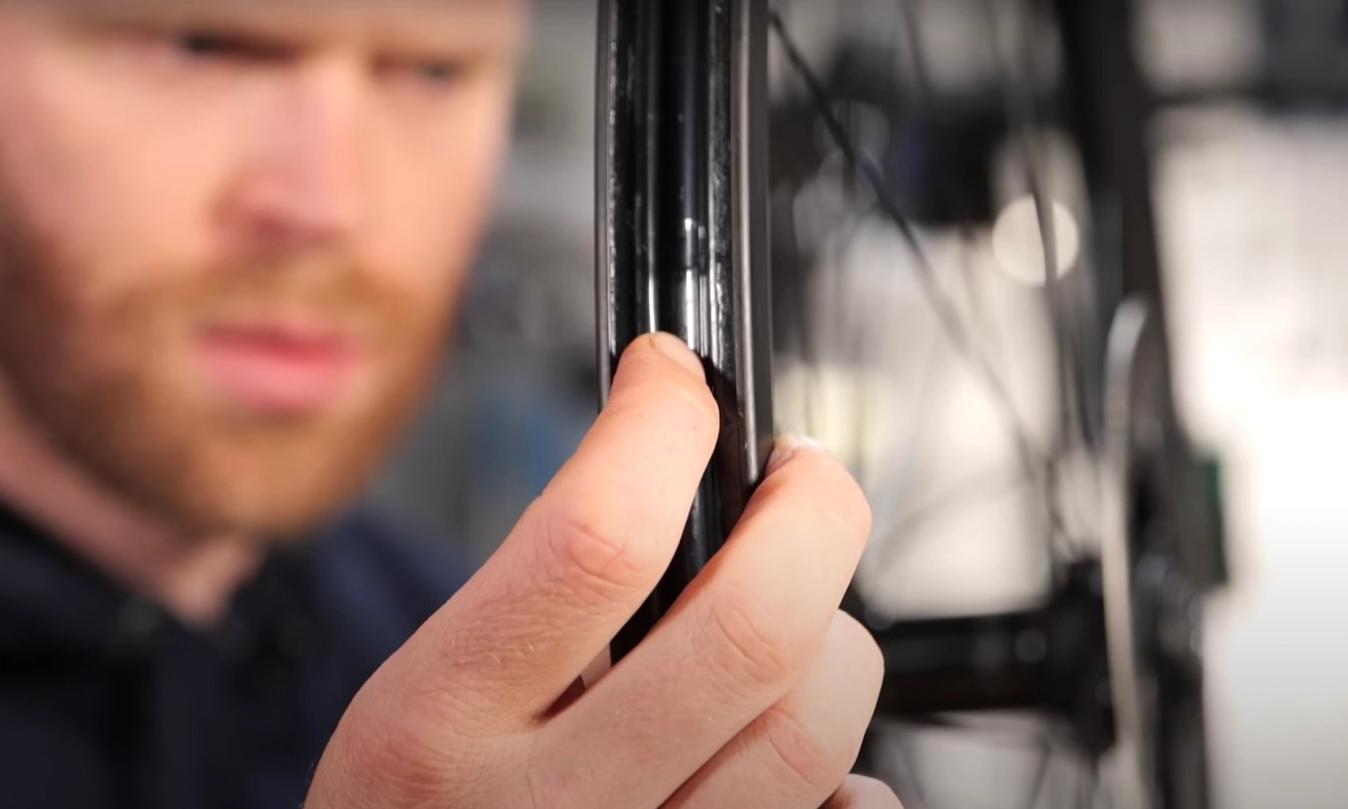
© GCN
Inspecting the rim tape at the start of the setup is the best way to prevent air leaks later down the line
When installing tubeless rim tape, the best practice is to start opposite the valve hole and work your way round the rim pulling the tape nice and tight to get it to form to the shape of the rim. It is important to fit the correct size tape as if it is too narrow, it won’t sit well in the rim or seal the spoke holes. Ideally you want to use a rim tape that is just a fraction wider than the internal rim width, this way it will curve up the rim wall slightly creating a perfect air-tight seal.
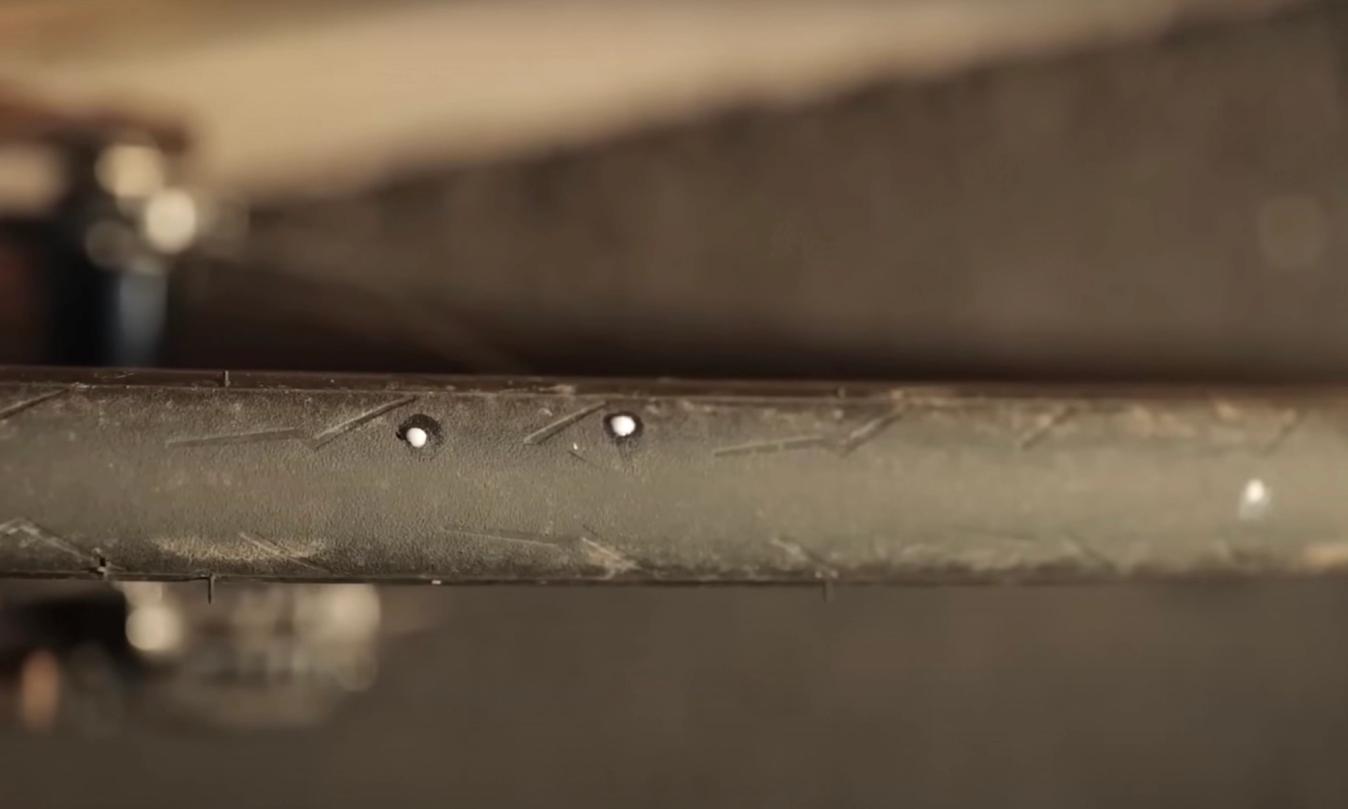
Valve installation
The most common place for a tubeless system to leak from is around the valve. It is the largest area for air to leak from and a poorly fitted valve is only going to increase the chances of this becoming an issue. When installing the valve you want to make sure that there are no gaps in the rim tape larger than the valve and ensure that the valve is seated correctly in the rim channel. Something that comes with all tubeless valves is a small O-ring that should sit between the rim and the locking nut as another seal for the system.
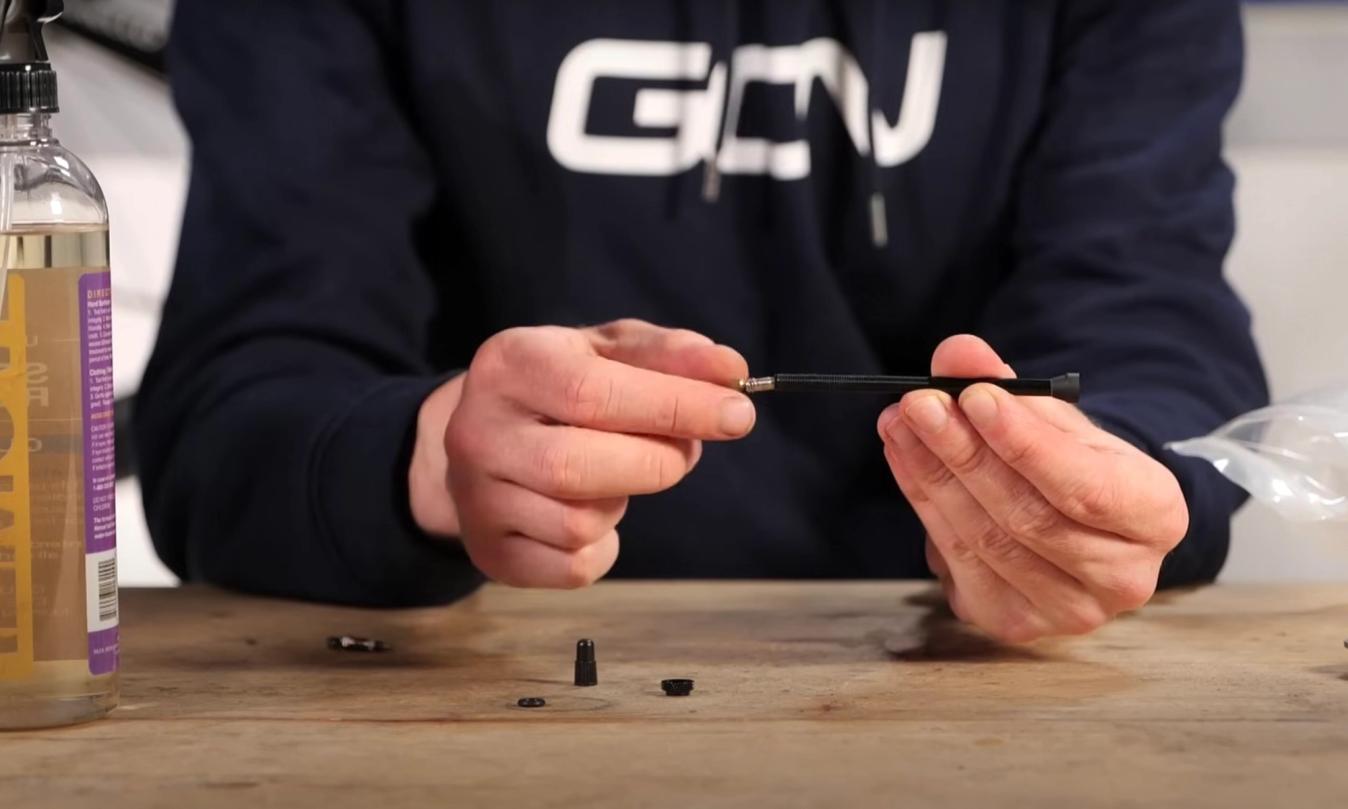
© GCN
Removing the valve core and checking for old sealant is a good way to ensure the tyre will inflate on to the rim without too many issues
If you are using a pre-used valve, it is worth removing the valve core and inspecting the valve for any old and dried sealant that could prevent the tyre from inflating. Using a small pick to clean out the valve and cleaning off any build up from the core will ensure that the valve is fully functioning.
Fitting a tubeless tyre
Fitting a tubeless tyre can be a struggle, as they tend to be a little bit tighter than a traditional clincher tyre. This is to ensure that they are going to seat on to the rim and create that air-tight fit that the set-up relies on.
The easiest way to go about installing a tubeless tyre is to ensure that the bead of the tyre is placed in the centre of the rim. This channel has a slightly smaller diameter than the edge of the rim giving that little bit more wiggle room to get the tyre to mount to the rim.

© GCN
Avoid using a tyre lever unless completely necessary as they can damage the rim tape
When fitting the second side of the tyre, it can be tempting to use tyre levers to force the tyre onto the rim. Doing this can cause some issues, as the lever can puncture or damage the rim tape and prevent the air-tight seal. Unless completely necessary, try and avoid using tyre levers and instead work your way around the tyre making sure the sections of tyre in the rim are located in the central channel.
Sealant
When you are looking to insert the sealant into the system there are two main methods that can be used. You can either remove the valve core and use a small tube that fits over the valve to insert the sealant into an already fitted tyre. Or you can pour some sealant into the well of the tyre before fully fitting it.
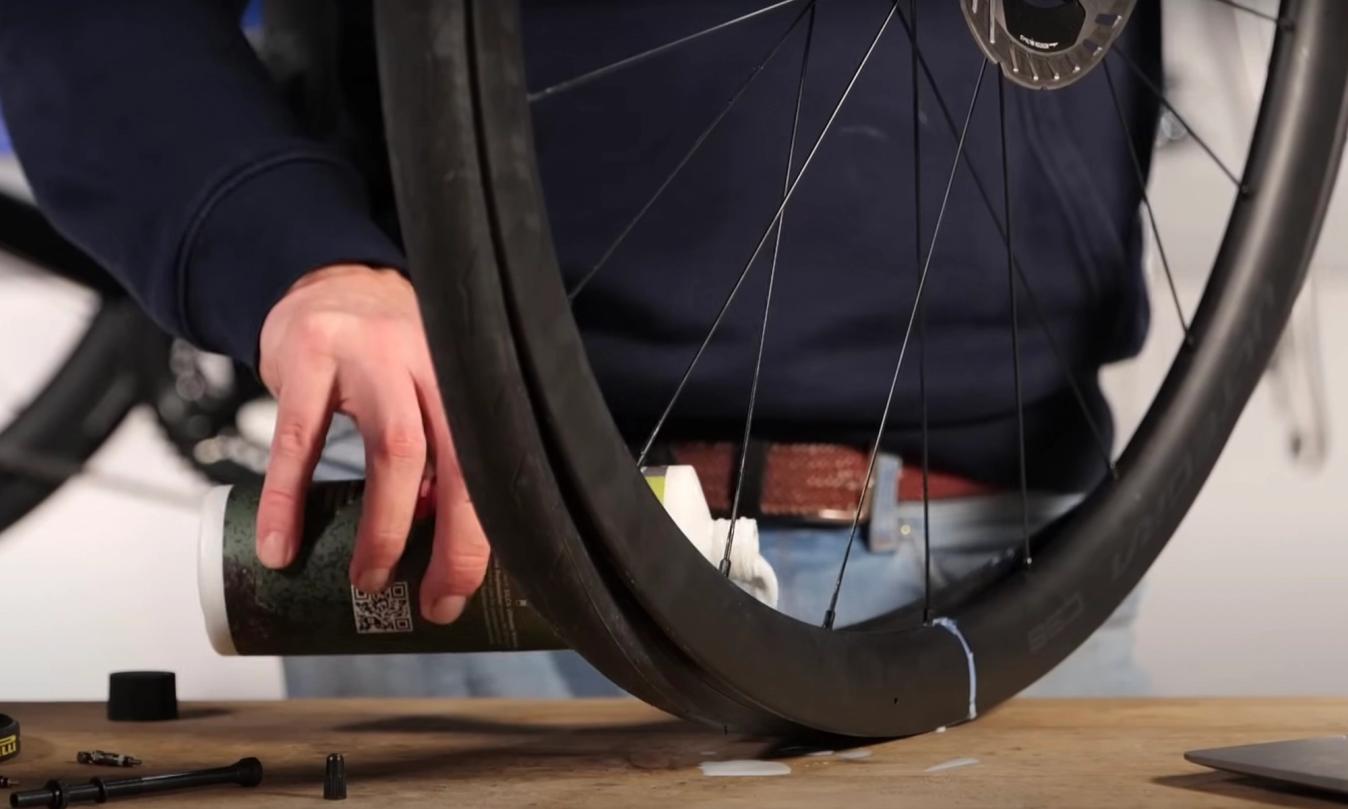
© GCN
Pouring the sealant in to the tyre well is the easiest method but can be a little messy
Which method you use will depend on what sealant you have and whether it can be inserted through a valve, as some of the premium sealants have particles in them to aid the sealing of larger holes that can get clogged in the valve. Although it might seem like the easier option, pouring the sealant in to the tyre and then fitting it can be a very messy process, especially if you have a hard to seat tyre.
Seating and inflating the tyre
Once the tyre is set up and fitted it is time to get it inflated. Due to the very nature of the tubeless setup not having a tube, it can be a little difficult to get enough air into the tyre quickly enough to push the beads of the tyre out onto the rim walls to create the air-tight seal. A hand pump that you might carry around on a ride is simply not going to have the volume to shift enough air into the tyre to inflate the system.
A normal track pump will often provide enough airflow to pop the tyre on to the rim especially for low-volume road tyres as the volume of air a track pump can move is more than enough to inflate the tyre. For a mountain bike tyre this more commonly is not enough and a compressor or charge system is needed that can dump a large volume of air very quickly into the tyre to pop it on to the rim.
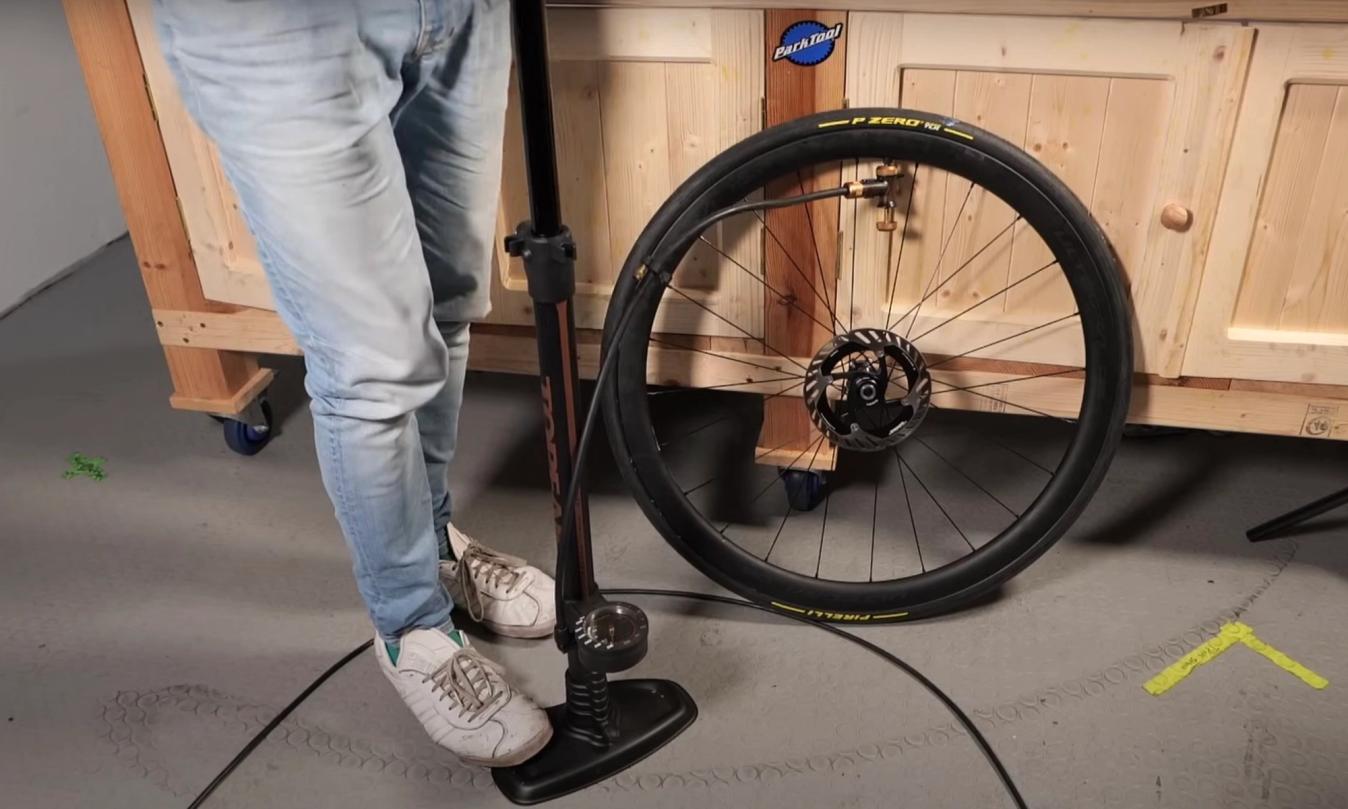
© GCN
Using a track pump is normally enough to inflate the tyre on to the rim, however removing the valve core can aid air flow if it is a struggle
If you are having a really difficult time getting the tyre to mount on to the rim you can try removing the valve core whilst you seat the tyre. This will allow for a large unrestricted flow of air to enter the tyre that will inflate the tyre enough to get it to seat. Obviously as soon as you remove the pump the tyre is going to deflate but the bead of the tyre should remain fixed to the rim, allowing you to re-fit the valve core and pump the tyre up normally.
If the tyre doesn’t fully seat the whole way around the rim, it may be that the friction of the tyre is greater than the force of the air pressure. You can inflate the tyre to its maximum recommended pressure to try and push the tyre up onto the rim, or alternatively if that doesn’t work, lubricating the rim and the tyre bead with something like soapy water can help reduce the friction enough for the tyre to seat.
Air leaks
Sometimes even with everything going to plan up until this stage, you get the tyre inflated only to find that the tyre doesn’t remain inflated for long. This points to there being an air leak somewhere in the system. Sometimes they are easy to find, while other times they take a bit more hunting out. If the air leak is not so obvious, one of the methods you can use to pinpoint it is to inflate the tyre and squirt a soapy water solution over the tyre and rim. Wherever the bubbles are coming from is the location of the air leak.
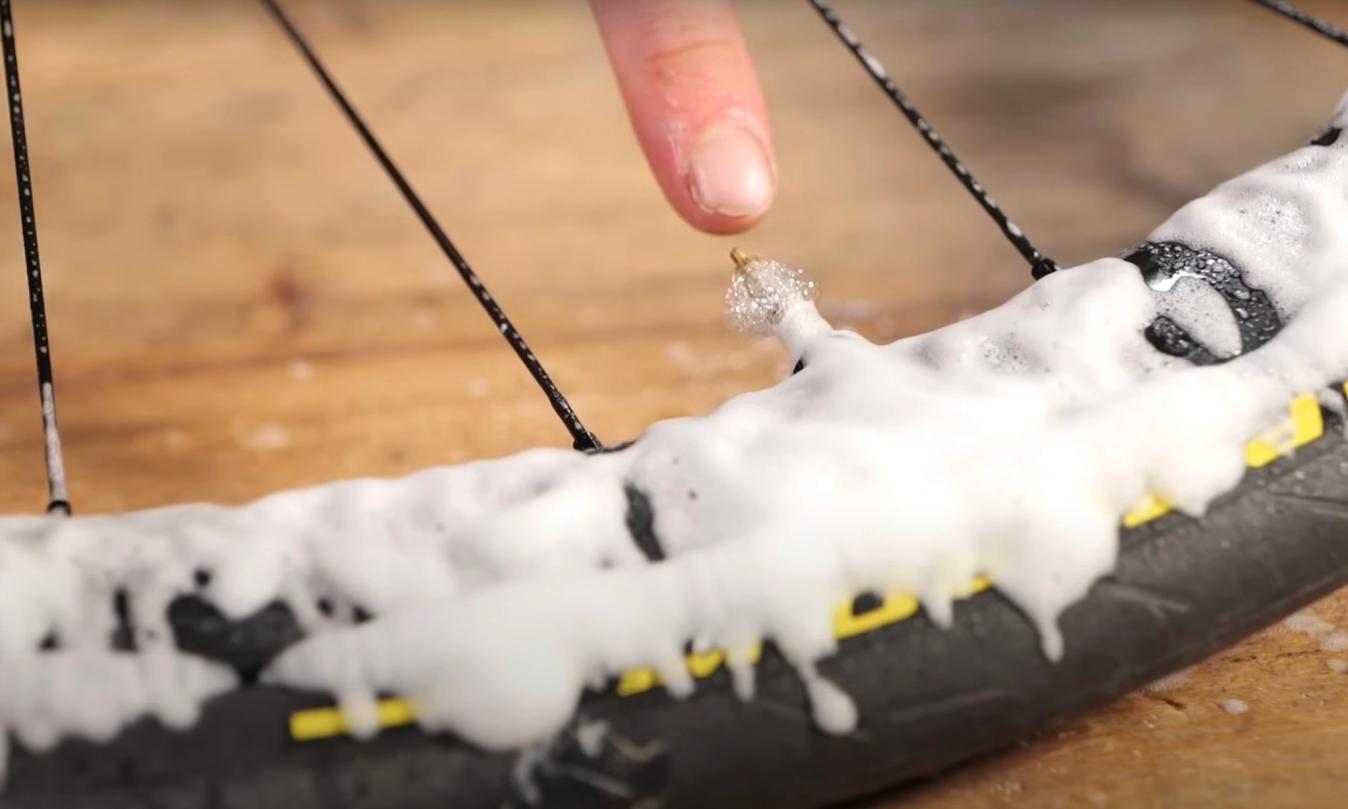
© GCN
Using a soapy water solution you can pinpoint the area the air is leaking from and work out the best action to solve the issue
Some air leaks can be nice easy fixes, for example if it is leaking from the valve, ensuring the O-ring is present and that the locking nut is fitted tight enough can normally remedy the issue. If there is air leaking from the rim where the tyre mounts, spinning the wheel to distribute the sealant can solve this issue.
Unfortunately sometimes it can be that the rim tape has been punctured or is not sealing the rim properly. If this is the case you will find air leaking from around the spoke nipples and the only solution to this is to remove the tyre, clean it all up and start again by re-taping the rim.
Don’t over inflate the tyre
It can be tempting to pump the tyre up harder and harder to try and get the tyre to seat, but as mentioned before you should never exceed the manufacturers recommended maximum pressure. If both the rim and the tyre have a recommended maximum pressure, always stick to the lower of the two values. If you exceed the maximum recommended pressure you could be doing damage to the rim or the rim tape as well as forcing air through the carcass of the tyre, which will result in sealant bubbling up through the surface of the tyre.
Roadside puncture repair won't seal
If you do pick up a puncture that doesn’t immediately seal on its own there are a few courses of action you can take. If the tyre isn’t fully deflated then stopping as quickly as you can do safely and then spinning the wheel by hand will help centrifuge the sealant to the hole, potentially increasing the volume of sealant in the area enough to seal the puncture. If however that doesn’t look to be working, keep the hole at the top of the wheel so you don’t lose any unnecessary sealant from the system.
© GCN
If the holes are too large for the sealant to immediately plug the puncture there are a few things you can do
At this point you are going to need to inspect the tyre to see if it can be plugged. A tubeless plug is essentially a small strip of rubber that you can force into the hole with a special tool to fill the gap, giving the sealant a far smaller puncture to seal. If you haven’t used a plug before, check out our video so that you can be well versed in the event you need to use it. Like everything, plugs do have their own limitations and will not be effective on tears in the tyre, slashes or punctures on the sidewall of the tyre.
Using an inner tube
If plugging the tyre is not a solution that is going to work, the best bet is to fit an inner tube inside the tyre. If this happens spend some time inspecting the inside of the tyre for any debris that has been sealed that could puncture the inner tube.
© GCN
It is always recommended that you carry an inner tube even with a tubeless set-up as a 'get you home' measure
This should be seen as a get you home/salvage your ride fix rather than a long-term solution. If the tyre has a hole or tear in it too big to seal or be plugged, it is probably time to look at purchasing a new tyre.
Excess sealant
If the worst does happen and you need to resort to fitting an inner tube, you are going to have to contend with the remaining sealant in the tyre. It is important to discourage pouring it away as it can contaminate the environment and surrounding wildlife, so keeping it in the tyre is the kindest thing you can do.
As a result packing a pair of nitrile gloves in your saddlebag can help keep things a bit cleaner for you and they take up no space at all. If there is a lot of sealant inside the tyre this can act like a glue, sticking the tube to the tyre walls. If this dries it can be a pain to remove the inner tube, so the best bet is to inspect everything post ride and either repair the puncture and set the system back up as tubeless or clean the tyre out and refit the tube in a clean, sealant-free tyre.
No sealant
It is important to remember that tubeless sealant has a usable life, this means that over time its performance will degrade as it dries up. Eventually if left, the sealant will dry completely inside the tyre and will no longer do its job. It is hard to put an exact life on sealant but the manufacturer will most likely state a recommended interval to change the sealant. As an interim check to save you from removing the tyre, you can check through the valve.
To do this, place the valve at the bottom of the wheel and remove the valve core, once the valve is open you can use something like a spoke or zip tie to poke through the valve as a dipstick to check for how much sealant is still liquid in the tyre.
This isn’t an exhaustive list of solutions to remedy issues with tubeless tyres, however these are by far the most common. If you want to find out more, why now check out the five worst things about tubeless tyres to see if you agree.
If you don’t, let us know why in the comments section!


Latest Videos


Related Content

How much does bike technology really boost performance? - GCN Tech Show
Alex Paton and Ollie Bridgewood look at how the tech behind Van Rysel bikes might be driving more success in the pro peloton

3T adds the Strada Italia to complete its made-in-Italy trilogy of bikes
The new bike is the all-road sibling to the Extrema and Racemax Italia

Narrow handlebars, perfect bike saddles and chain wax: GCN Tech Clinic
Why are UK brakes set-up so weird? Can I still climb with narrow handlebars? Will my chain lube evaporate while the bike's in storage? All these bike tech questions answered in this week's clinic

Bike set-up at the Giro d’Italia: The end of slammed stems?
GCN’s Alex Paton scoured the WorldTour peloton to find out if pro riders are raising their handlebars to gain speed