What are power and heart rate zones and what do they mean for cyclists?
Depending on which model you use there can be between three and seven training 'zones' - here we take a look at which model is right for you
Alex Hunt
Junior Tech Writer
The concept of cycling training zones has been around for a while now and if you've spent any time researching them, you will have almost certainly realised something: there is a lot of different ideas to choose from. Some models use three zones, whereas others can use as many as seven.
With this many options, it's easy to become overwhelmed with information. So choosing which model works best for you, and how you should structure your training becomes a real issue.
In this video Si Richardson takes a look at the specifics of the different training zones to help you incorporate the right one into your training and riding.
Why do we need training zones at all?
Training zones provide boundaries between the different levels of intensity in which we train. No matter how many divisions you ultimately use, training zones allow you to consistently ride at certain intensities, all with different benefits.
Zone training allows us to make sure that when we intend to ride hard, we are really riding as hard as possible. Conversely it helps ensure that on an easy ride, we are actually keeping things more relaxed. A recent study conducted by the university of Loughborough found that using training zones can help develop the capabilities of endurance athletes.
The specificity that training zones allow means that tailored plans can be devised to meet the needs of individual riders. So for the same amount of time on the bike, you can get fitter and increase your performance, compared to a random approach which does not follow a structure.
The ability to know which zone to ride in can cut down on wasteful junk kilometres that detract from efficient training. In turn, this makes your training time more effective, even if that means going slower than you'd like at times.
By knowing your zones, you can meaningfully trigger the desired training effects and boost your fitness. Without knowing your zones, you're at risk of never actually hitting a level of efficiency that comes from the consistency of repeatable training structures.
In a way zone training allows cycling to be structured like other more controlled sports. For example gym training is easy to structure, as each weight is measured with different rep ranges used to train for different goals. The training zones in cycling represent the different weights in the gym, allowing you to build your fitness based on your goals.
Do I need a power meter for training zones?
Although this will make training data more reliable and accurate, having a power meter is not a necessity for zone training. Some methods can use either the rating of perceived effort (RPE) or heart rate that will allow for the same outcome, although both of these measurements are less objective.
- Read more: Should we all be doing ramp FTP tests?
The best method that will allow you to keep an accurate track of progress is through using a combination of all three. As we are not robots, riding just to a power figure might not tell the whole story. External factors such as stress, fatigue, fuelling and hydration can all affect how riding at a given power will stress your body.
When you partner power with heart rate you get both objective and subjective perspectives on training showing the absolute training stress (the power you are riding at) along with the experienced training stress (heart rate for a given effort).
On some days, riding at the same power output will put you at wildly different heart rates. This is because the body is responding to the effort differently. Using both power and heart rate together can show you if you are fatigued or heading towards overtraining.
Training with just heart rate
It is possible to conduct zone training with just a heart rate monitor. However, this does have some limitations. Heart rate is inherently slow at responding to efforts and experiences – this is known as ‘lag’. This means that for shorter duration efforts of around five minutes or less, riding to heart rate becomes difficult to impossible.
For longer steady-state efforts like a long endurance ride or a time trial effort, riding to heart rate is a useful metric. It is important to remember that it is subject to variation so needs to be combined with some mindful awareness of your RPE.
Training with RPE
Regardless of the tools you have to track your training zones, there is one thing that we can all use: rate of perceived exertion (RPE). The rate of perceived exertion is how an effort actually feels and how your body is dealing with the training stress on any given day.
By keeping track of your breathing you can pretty closely detect the changes in training zones mentioned in the three-zone model below. As the intensity increases you will get to certain markers where your breathing goes from calm and easy to rhythmic and deep. And then again as you enter the upper zone it will become ragged and hard to control.
Using your breathing to gauge your RPE is better than using the feeling of your legs. This is because in any hard effort your legs inevitably start to hurt and will tell you to ease off. Breathing is more objective to the actual physical demands you are putting on your body.
What are training zones?
On the surface, training zones offer a nice easy way to separate the intensities you ride at. If you dig a little deeper the points at which different zones begin and end are based on the changes in the metabolic response required to ride at them.
Simply put, this means that in different zones your body will be calling upon different energy systems to supply your muscles.
Three-zone training
This is arguably the original training model that uses three zones to divide up the intensities at which you ride. The zones are endurance, threshold, and above threshold, and they correspond to the lactate levels in your blood. This is an insightful way to determine how hard your body is working at a given output.
© GCN
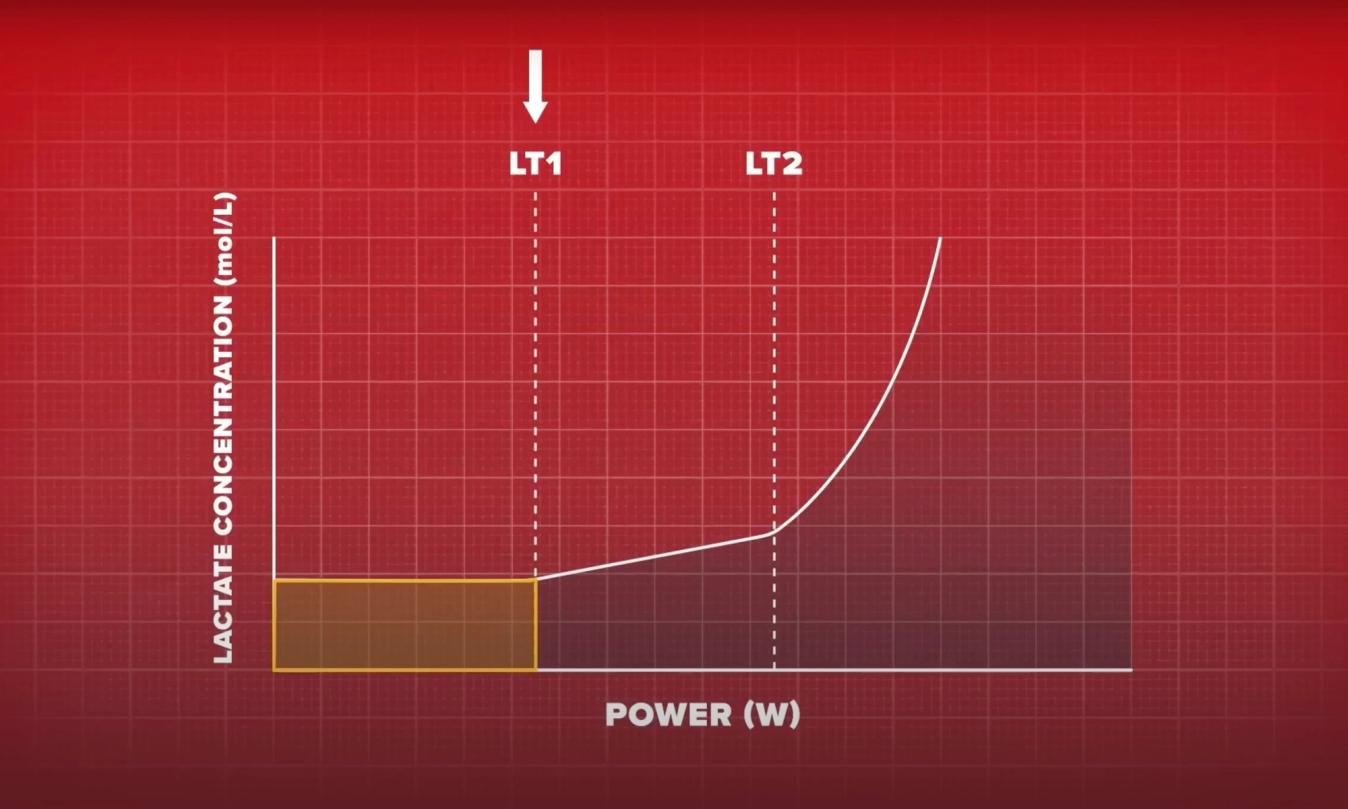
This model is simple with just two inflection points that mark the transition between zones
If you were to visit a sports science lab and have some blood lactate testing carried out, you'd see that as the intensity increases there are two clear points where the trajectory of the results changes quite obviously.
The first one occurs when the lactate levels go from stable to a steady increase - this is known as LT1 and signifies the intensity at which lactate begins to build in the body. The second inflection point indicates where the increase in lactate goes from a linear trajectory to an exponential one.
Zone 1
This is most commonly referred to as the ‘endurance’ zone. This is where blood lactate levels are stable and are not increasing. This is because at this intensity any lactate that is produced can quickly and easily be broken down in the body.
Zone 2
This zone is marked by the first inflection point on the graph and marks the move from the endurance zone into the ‘threshold’ zone. In this zone, your body is not able to clear any lactate as fast as it is being created meaning that over time there is a steady increase in blood lactate levels.
Zone 3
This zone begins at the second inflection point on the graph and marks the point at which you are now producing more lactate than your body can process and puts you firmly in an unsustainable state. Efforts in this zone will be anaerobic in their nature, meaning that they will be short in duration as your muscles are using more oxygen than your body can supply.
The three-zone model is fundamentally a good model to use and has stood the test of time. This simple model of three zones uses clearly defined changes in the energy demands required to separate them.
The main issue with this model is that accurately setting the zones is easier said than done. This is because blood lactate testing is not readily available and is costly if you decide to get tested in a sports science facility.
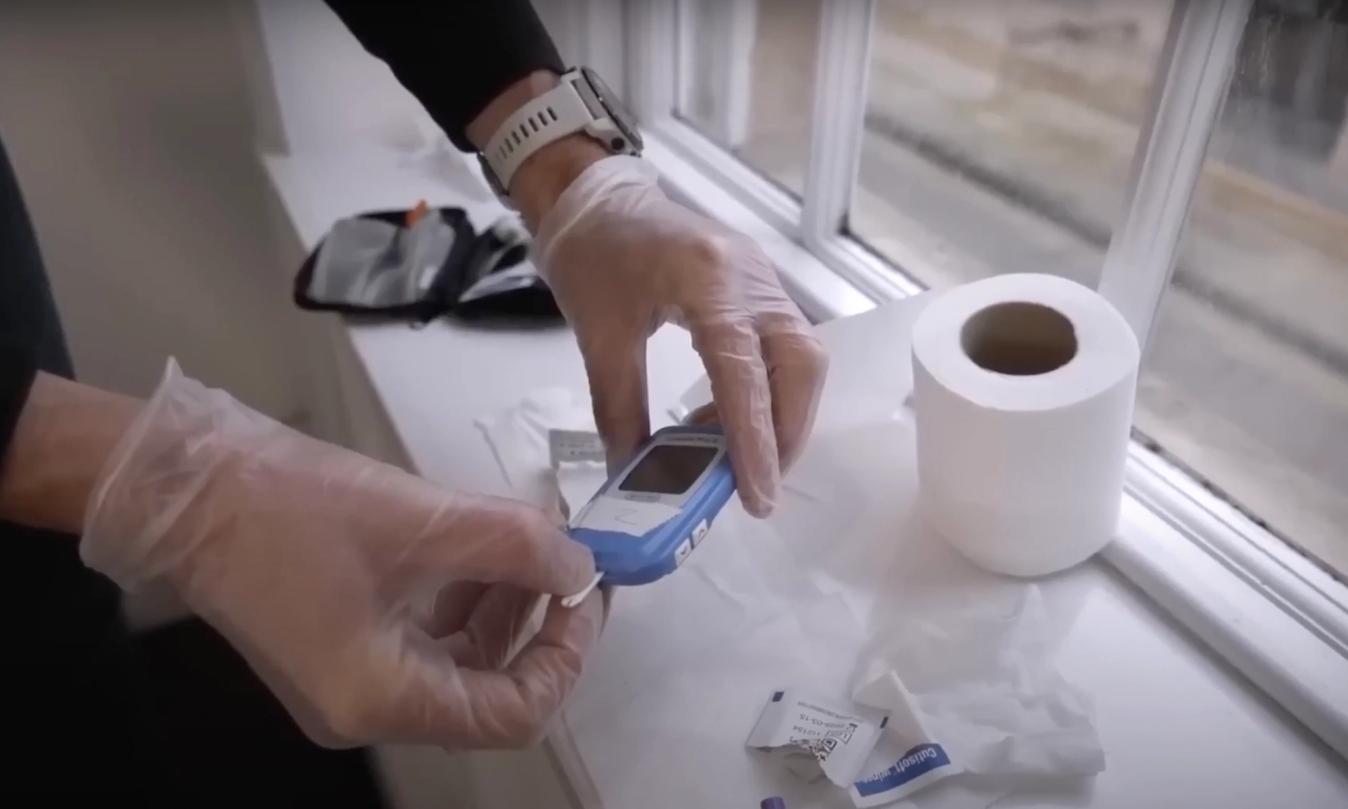
© GCN
The three zone model is based around blood lactate levels, not something that is easy for everyone to find out
What is interesting as well as considerably cheaper is that your natural breathing pattern changes as you enter each zone, as does your heart rate. A general rule of thumb is that the higher your lactate levels, the higher your heart rate.
The three-zone model, although scientifically robust, can seem somewhat overly simplistic for our specific needs as riders. It leaves a lot of grey areas that are not defined in the model. It means that two rides in the same zone can vary wildly in actual intensity and their training effect and fatigue. It is this broad ambiguity that limits this model and makes other options more enticing.
Five-zone training
This model is arguably now the most commonly used as it's what Apple uses on its Apple Watch devices. This model increases the specificity of each zone to allow you to be a bit more precise with your training.
Zones 1 and 2
These zones replace the whole of zone 1 from the three-zone model. This will give you an active recovery zone at the lowest end of the spectrum along with a more constructive endurance zone that will keep you closer to the intended intensity of the session.
Zones 3 and 4
Similarly to zones 1 and 2, these two zones separate the ‘threshold’ zone into a more moderate ‘tempo’ zone along with the traditional threshold zone that more closely aligns with your actual lactate threshold.
Zone 5
This zone remains the same as the three-zone model and symbolises any intensity above your lactate threshold.
This model is more specific than the three-zone offering, and this does allow for more specific training, especially around sub-threshold intensities. Where it is lacking is in any sort of division in intensities above threshold. This means that any effort from around 20 minutes down to 10 seconds is still governed by the same zone.
Six-zone training
In cycling we typically do not only ride under our threshold. Unlike marathon running, for instance, there are often big jumps in the effort needed to match the group and retain draft, or better yet, to drop people from your wheel. Thus, being able to accurately train above threshold is an important element to performance. This is where the six-zone model comes in: it is broadly similar to the five-zone model but adds an additional zone above threshold.
Seven-zone training
This model was created by Dr. Andy Coggan who co-authored a guide on the subject, the book Racing and Training with a Power Meter. It keeps the first four zones identical to the five and six-zone models, however, the band above threshold is now split into three zones.
This is ideal if you are looking to train specific systems above your threshold, making it a go-to model for competitive cyclists. Along with the existing first four zones from the existing model zones five, six and seven all have slightly different characteristics.
Zone 5
This is often referred to as VO2 max. Intervals in this zone range from three to eight minutes with these efforts starting off feeling manageable and quickly turning painful. Riding in this zone is defined as between 105-120% of your functional threshold power (FTP), putting a fairly narrow band on this specific training.
Zone 6
In a seven-zone model, zone 6 refers to your anaerobic capacity. This is the zone at which you are using oxygen far faster than your lungs and cardiovascular system can supply it. Typical intervals in this zone are from 30 seconds up to three minutes. This zone is defined as anything greater than 121% of your FTP.
Zone 7
This final zone is known as the neuromuscular zone. This is because it doesn’t pull on the same metabolic systems as the other zones. Zone 7 is a flat-out max sprint effort of less than 20 seconds. This is mainly a muscular effort rather than a cardiovascular effort as no oxygen can be replaced in the muscles during a zone seven effort.
Which model is best?
This can be down to preference as well as the training tools that you have available, however, it is hard to look past the seven-zone model as being the most useful for cyclists. The depth and detail it provides allow you to be incredibly specific with the training you complete. By having three individual zones above your threshold you can train for the different metabolic states they draw on accurately.
What are the issues with zone training?
The main issue with zone training is that it will only ever be as accurate as you can make the zones. All models use your threshold as a starting point whether that be heart rate or power. This will give you a very accurate upper zone 4 (in the five, six and seven-zone models), however from there every other zone is calculated by extrapolation and some arbitrary percentages.
.jpeg?w=1348&auto=format)
© GCN
Accurately setting your zones is the most important element to get right regardless of which model you intent to use
Unfortunately, as humans, we are all built differently so the blanket percentage ranges are not always going to be true for you. This is where using the breathing method to help find your zone 2 as well as some anaerobic efforts will more closely map out your training zone profile.
In conclusion
If you have the tools available to you, using the seven-zone training model is going to provide you with the most accurate and detailed information to base your training around. If you are riding just on feel, the three-zone model will be accurate enough to ensure you are roughly in the right area. Most importantly getting the most out of your training zones requires accurate testing to keep track of your progress.
For more on everything training related make sure to check out our dedicated training section.


Related Content

How much does tech affect performance? Pro and a £100 bike versus killer climb
Conor Dunne and James 'Hank' Lowsley-Williams recruit Max Stedman to take on a steep climb on a 1980s Peugeot bike
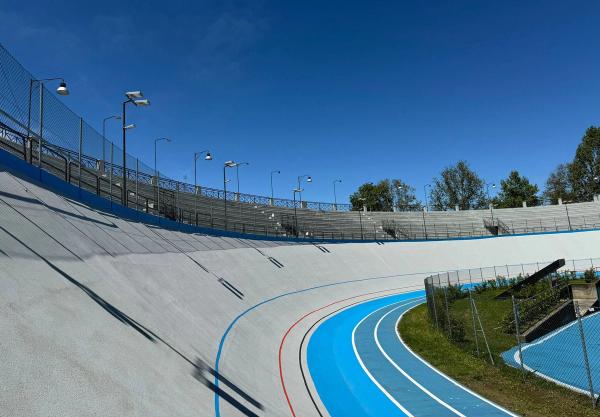
Concrete, Coppi and community: The salvation of Turin's outdoor velodrome
The Motovelodromo Torino Fausto Coppi has a rich 100-year history but fell into disrepair for two decades. Nearly bulldozed for a supermarket, it's now thriving once more
Dan Lloyd’s journey back to fitness and health: The importance of VO2 max
In the second instalment of the series, Dan is looking into VO2 max and why it matters for health

Essential bikepacking gear: Conor Dunne's tips to start your cycling adventures
Conor explains his choice of bike, baggage, clothing and accessories for the ultimate bikepacking adventure