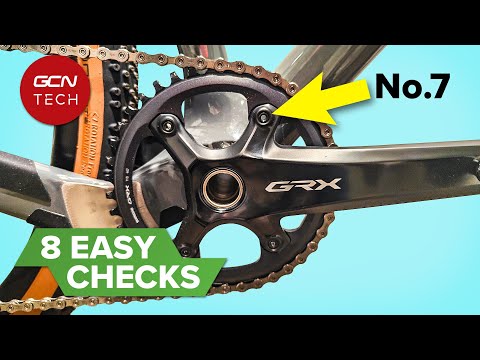
How to measure chain wear correctly
Knowing how to measure the wear to your chain and when it needs replacing can save you a considerable amount of money
Alex Hunt
Junior Tech Writer
Keeping on top of your bike’s chain maintenance is a quick and easy way to prolong the life of your drivetrain. Keeping it clean and well-lubricated can see the drivetrain of your bike last for thousands of kilometres longer than a poorly maintained one. The question is: how do you know when your chain has come to the end of its useable life?
Even though a chain might look okay to the naked eye, it can wear to the point that it starts to affect how it interacts with the cassette and chainrings. If you continue to use a chain beyond this point it can accelerate the wear of other components, costing you more in the long run. Luckily, keeping on top of the state of your chain is an easy job you can do whenever you clean your drivetrain.
- Read more: How to make your drivetrain last longer
There are a couple of different ways to go about measuring the wear of your chain. However, all of these methods do require you to have some form of chain-checking tool. These typically cost under £/€/$10 but you can spend considerably more if you want to. These tools sit between the links of the chain and measure the distance between the links. This will then give a reading which translates to the health of your chain.
What do the numbers on a chain checker mean?
All chain-checking tools will have the same numbers written on them from 0.25 through to 1 in 0.25 increments. These numbers refer to how much the chain has ‘stretched’ as a percentage from new. This ‘stretch’, as it is commonly known, is simply a result of the chain wearing away so the pins and links all start to sit further apart - giving the effect that the chain has been stretched.
How do you use a solid chain checker?
One version of a chain-checking device is a solid steel tool that has been laser-cut to a specific size. Although this can achieve a higher level of accuracy, knowing how to properly use it is crucial to prevent errors in the reading.

© GCN
When fitting the chain checker to the chain it is important that the measuring pin is butted up against an inner link
To start off with, place the back of the rear pin of the chain checker up against one of the inner links of the chain. If you use an outer link it is possible that you might get an incorrect reading. Once the chain checker is in place you need to pinch the chain up against the base of the tool to tension the chain.

© GCN
How far the measuring pin drops in to the chain will indicate the level of wear
At this point, you can offer the other pin up to the chain. A new or lightly used chain will not allow the pin to sit into the link of the chain, but as the chain wears over time, more and more of the pin will sit in the chain. On most chain checkers of this type, there will be a reference stamped on it denoting what each step on the pin corresponds to.
How do you use a chain checker with a gauge?
The other common type of chain checker uses a sliding scale to give you a reading of how worn your chain is. This type is arguably easier to use correctly but it is still important to make sure you know how to get an accurate reading. Much like with the solid chain checker, you want to position the measuring pins on the inner links of the chain.

© GCN
This type of chain checker is initially fitted in the same way as the solid tool but is then lightly tensioned to provide a reading
Once the tool is in place you gently slide the gauge until there is a little resistance before taking a reading. With this device it is important to store it in a safe and protected area as the pins are liable to bending which would result in an incorrect reading. It is also key to note that only minimal pressure should be applied to the tool when measuring the chain. Any more than this will both give you an incorrect reading and risk bending the pins.
When do I know it's time to replace my chain?
Although you might have a reading for the percentage wear of your chain, without any frame of reference this number is worthless. Knowing at what level of wear it is time to replace your chain can save you a lot of money in the long run, as this will prevent other drivetrain components from wearing prematurely.
- Read more: How to replace a bike chain
It is not as simple as a one-size-fits-all strategy when it comes to replacing your chain. Depending on what speed cassette you have, this will determine at what percentage of wear you will need to swap your chain out.

© GCN
When you will need to replace your chain will depend on the type of chain on your bike
If your bike has up to and including a 10-speed cassette then you need to think about replacing your chain as it approaches the 0.75% mark. If you are riding a bike with either 11 or 12-speed gearing then you will need to replace the chain a little sooner at 0.5% wear.
It is important to note that if your bike does have an 11 or 12-speed drivetrain and it has reached 0.75% wear or greater it is highly likely that you will need to replace the cassette as well as the chain.
How can you make your chain last longer?
Even ‘just’ replacing your chain isn’t exactly cheap so maximising the life of your chain is often a worthwhile investment. The easiest and cheapest way to extend the life of your chain is to keep it clean and well lubricated. A clean chain will not be subject to the same levels of wear as a dirty chain where small parts of grit can find their way into the links and rollers and grind them down.

© GCN
Waxing your chain can extend its life by thousands of kilometres
If you want to take things one step further, waxing your chain can deliver the best results in regards to the lifespan of a chain. Because the wax treatment sets and dries on the chain there is no oily residue to pick up grit and grime. That ensures the chain is not subject to the same accelerated wear as a typically lubricated chain will be.


Related Content

What to look for when buying a used road bike
How to tell the difference between a great deal and being ripped off – the signs to look for and questions you should ask

How to quickly find the right saddle height
Saddle height has a large bearing on comfort, so it's important to get it right

Creative commuting: How to have fun on your ride to work
Don’t allow your cycling commutes to become boring. Follow these top tips to make your ride to work entertaining
8 essential bike maintenance checks to do before a race
Follow Ollie Bridgewood's easy tips to avoid common bike mechanicals during your next big event