How to create a maintenance log for your bike using Strava
You can do more than just upload your rides to Strava – with this top trick you can keep on top of your maintenance schedule with ease
Alex Hunt
Junior Tech Writer
Routine bike maintenance is the best way to keep your bike rolling issue-free for kilometre after kilometre. However, It can be hard to accurately gauge how many kilometres your bike’s components have been used for, which can lead to you riding them past their best and causing other more expensive wear or damage to other parts of the bike.
Luckily, if you are a Strava user, there is a nifty way to keep on top of your maintenance log just by using the app. By adding your bikes to your profile, logging your rides and making notes about your components, you can keep track of exactly how many kilometres each part of your bike has been ridden for, and when they need replacing.
How can I use Strava to track maintenance?
This trick works for users of both the free and the premium versions of Strava, meaning that there is no excuse for letting your components wear excessively in the future. Here’s how you can use the app to keep track of your maintenance.
Add your bikes to your profile
If you haven’t done so already, you will need to add your bikes to your ‘Gear’ section on the app itself. To do this, you need to head to your profile page and scroll down to where you can see the section titled ‘Gear’. When inside this menu you will be able to select a plus at the top of the page and add your bikes. Here you can put in all the information about your bike and even give it a nickname, if that's your thing.
- Read more: 8 Strava features everyone should know about
Selecting the right bike at the end of an activity
If you only have one bike logged on Strava you can skip this section as every ride will be automatically logged to that bike. If, however, you are fortunate enough to have more than one bike, you will need to make sure that when you are uploading the ride you log it to the correct bike.
To do this you need to head to the upload page or, if the ride has already been uploaded, the edit page. Here you can rename your ride, add some photos, put in some private notes and most importantly select your bike. When you have done this and saved the changes this will then add the distance of that ride to the bike's log.
Using the notes section
In each bike's own section in the app, you can find a notes section. This is private to you and is a great place to note down at what distances components were replaced or upgraded. This can also be a great place for noting down chain wear measurements, and any other issues you may have experienced with the bike.
Using the notes section is the ideal place to store your bike's routine maintenance work but it can also be used to show how long components last compared to one another. If you used a 105 cassette and then replaced it with a Dura-ace one, you will be able to see a direct comparison of how much longer one lasted than the other. This can help with making better-informed decisions when it comes to replacing or upgrading things in the future.
Ultimately, by setting aside a few minutes when you are cleaning your bike to give your drivetrain, headset, wheel bearings and brake pads a check-over and noting down any wear in the notes, you are likely to catch things before they become an issue. This will have the benefit of saving you money and hassle in the long run.
Which components do I need to track?
The most common area of the bike to miss its servicing window is the drivetrain. If you keep on top of measuring chain wear and replace the chain at its designated interval you can simply swap out the chain and return on your merry way. If, however, you leave the chain to go beyond its intended wear limit the repair bill will very quickly skyrocket with a new cassette and chainrings needing to be fitted.
How do I know if my chain is worn?
With the right tool, checking your chain wear is a simple 30-second task. What you will need to accurately measure the wear of your chain is a chain checking tool, these typically cost around £5-10 and once you have one it will never need replacing.
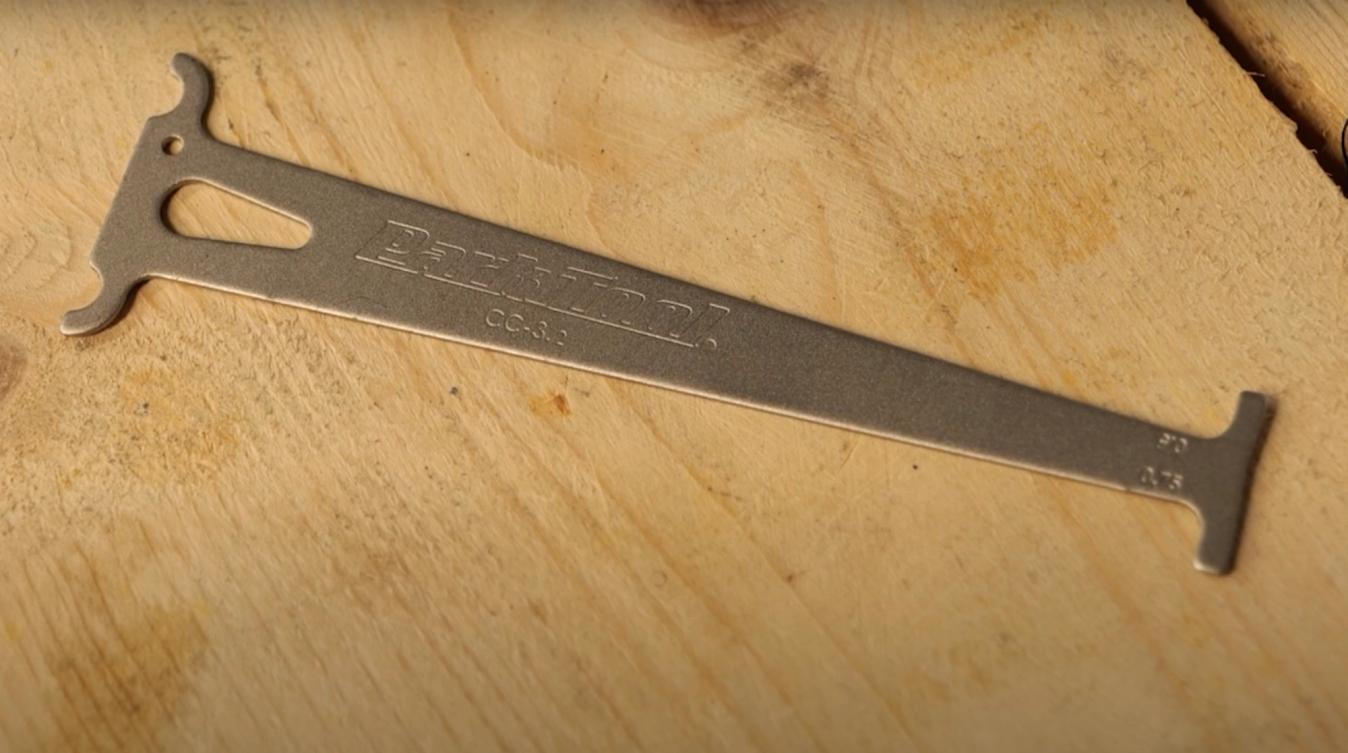
© GCN
A simple chain checker is all that is needed to keep on top of measuring drivetrain wear
Where it gets a little bit more complicated is knowing what the acceptable limit of wear is for your chain. For 11-speed groupsets and above, it is advised that the chain is replaced once it has reached 0.5% wear on the chain wear indicator. For 10-speed groupsets and below this can be extended out to 0.75% and for single-speed setups they can be run to 1% wear.
How often should I measure my chain?
How often you measure your chain can depend on a few different factors. Firstly, how often you ride. If you find yourself putting in hundreds of kilometres week after week it would be a good idea to check the chain once a week or every other week. For less extreme riding volumes, it would be fine to check the chain once a month or even every other month.
The conditions you ride in also affect the speed at which components will wear out so in winter months, or if you have ridden through particularly dirty conditions, it is worth checking the chain more regularly.
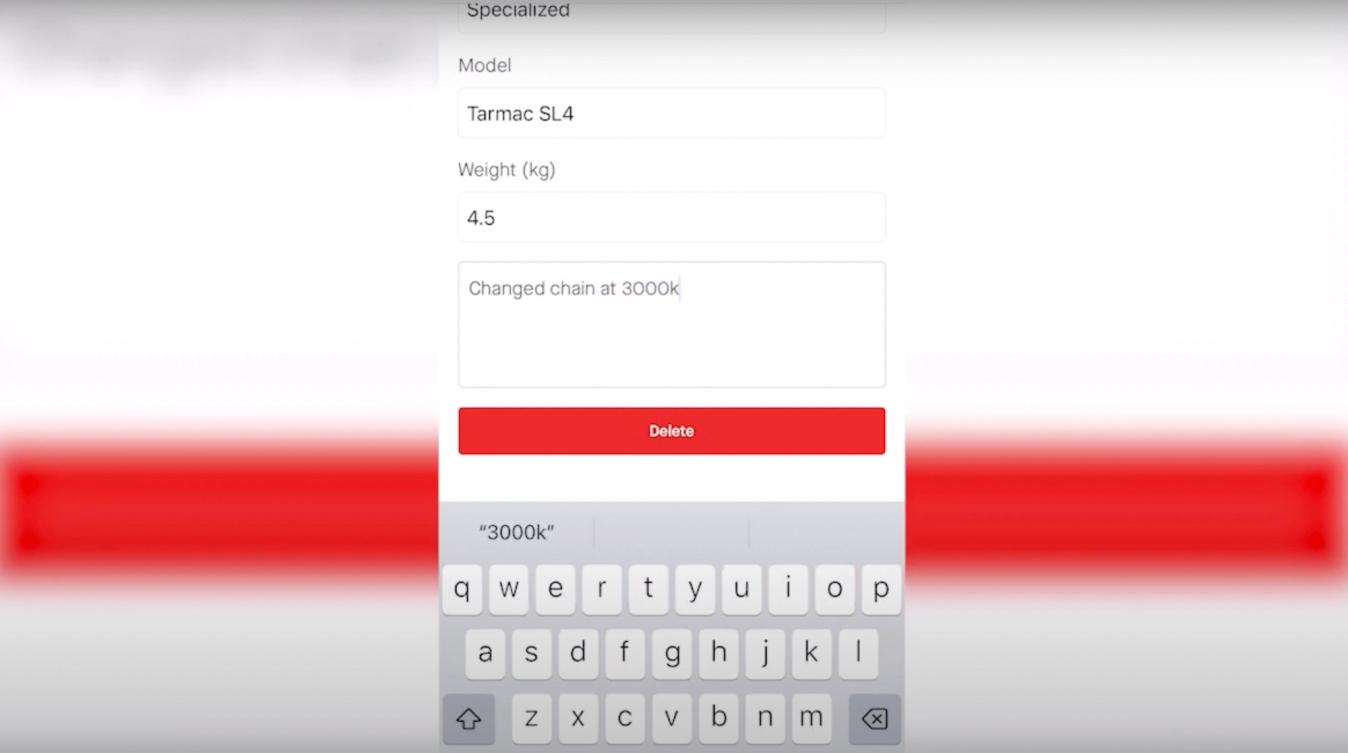
© GCN
Keeping notes of when components have been replaced in the Strava app keeps everything in one place
Furthermore, chain wear is not linear. It can seem fine for a long while but then once things do start to wear and degrade it can go from fine to beyond the replacement limit very quickly.
If you are already a Strava user making the most of its functionality by adding your bikes and documenting any maintenance to your bikes is the easiest way to keep on top of things. Knowing when to replace things and also how long they have lasted will have you saving money in the long run.
Do you have any other ideas for keeping on top of routine maintenance? Let us know in the comments section below. For more tech content make sure to head to our dedicated tech section of the website.


Related Content

Essential winter maintenance tips to keep your rides hassle free
Riding in the cold and damp can take its toll on your bike. These tips from Ollie Bridgewood will help save you money and keep you riding through the harshest conditions
How to replace a bike chain
If your chain is worn out, here's how to swap it for a new one

8 Strava features everyone should know about
From messaging to flyovers, here are eight features that will help you to maximise the Strava app
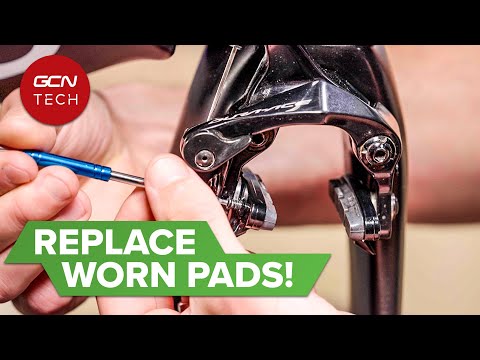
How to replace rim brake pads
Changing rim brake pads is an important job to know how to do. It's not difficult but there are a few things to make sure you get right.