Six equipment changes that will turn your road bike into a gravel bike
With a few adaptations, your road bike can become a capable off-road machine.
James Howell-Jones
Junior Writer
If you're a road cyclist who wants to give gravel a go, you don't need to buy an entirely new bike. For most gravel riding, a road bike, especially a modern road bike with disc brakes and generous tyre clearance, will be absolutely fine.
To get the most out of your road bike on rough stuff, and to protect it from knocks and scrapes, there are a few adjustments you can make. Here are six equipment changes that will make your road bike gravel-ready.
If you see yourself doing a lot of gravel riding, especially on rougher terrain, you should consider switching to a gravel bike. The geometry, components and durability of a proper gravel bike is far better suited to the demands of off-road riding.
Read more:
- What should I buy, a road bike or a gravel bike?
- 6 key differences between gravel bikes and road bikes
- Everything you need to know to start riding gravel
1. Fit the widest tyres possible

© GCN
Most road bikes are specced to fit 32mm tyres, but some can fit wider tyres
The main difference between a road bike and a gravel bike is the width of the tyres. Gravel bikes have wider tyres, usually around 40 to 50mm, to improve grip, comfort and puncture resistance. On a road bike, the frame design won’t allow for super wide tyres. The fork and rear triangle will be designed to fit closely to the wheel, both for aerodynamics and to achieve that short-wheelbase, agile road bike handling we know and love.
In most cases, manufacturers set a tyre size limit of 30 to 32mm. To improve the handling of your bike on gravel, check the specification of your bike and fit the widest tyres you can. Once they’re fitted, check the clearance is ok. Generally speaking, you need about 5mm on either side of the tyre on the fork, chainstays and seatstays. Any less, and your wheel could rub on the frame as they flex when you climb out of the saddle.
To reduce the vibrations going through the frame, as well as to improve the handling and grip, wider tyres are a must. Look at your frame’s specifications and fit the widest tyres you can fit within the manufacturers recommendation.
It might be tempting to stuff in the widest tyres you can possibly fit in the frame, but proceed with caution. A wider tyre might just about fit in the frame when you’re testing it out at home, but once you start riding, you’ll likely come a cropper. Without at least 5mm clearance on either side of the tyre in the fork, chainstay and seatstay, you might find your tyre rubs against the frame when you actually get on the bike and pedal. The issues usually come when riding out of the saddle. When you rock the bike side to side, the wheel flexes and rubs against the frame. Over time, this friction can damage your paint and even the frame material beneath it.
Squeezing in bigger tyres than the manufacturer recommends causes more problems when the trails are wet and muddy. Often, mud ends up being picked up by the tyres and lodged in the crook of the frame or fork. Over the course of a few kilometres, this can create a solid block of grime that rubs against the tyre, seriously slowing you down. To avoid spending your ride picking mud out of your frame with a stick, keep an eye on your tyre clearance!
Read more: Thin vs wide: which tyre is right for you?
2. Go tubeless

© GCN
Tubeless tyres are less likely to puncture, especially on rough terrain
Try to head onto the rough stuff with your standard clinchers and inner tubes and you’re probably going to end up suffering from pinch flats, which is when the tube is pinched between the ground and the rim. You can always tell when you’ve got a pinch flat: the tyre usually gushes all of its air within a few seconds, and the tube is left with a characteristic double puncture, known as a ‘snake bite’.
There’s a couple of ways of solving this. First of all, you can pump up your tyres so hard that they don’t flex as you ride, solving the pinch flat issue. On the downside, it’ll completely ruin the handling of your bike, and make gravel tracks feel incredibly rough and exhausting.
The better solution is to get rid of that pesky inner tube completely, by fitting your bike with tubeless tyres. Tubeless tyres are increasingly popular on road bikes, and when heading off road, they make a huge difference. Instead of an inner tube, tubeless tyres make the tyre and rim airtight, with special rim tape, precisely manufactured tyres and a liquid sealant to seal any punctures that happen as you ride. Since there’s no risk of pinch flats, tubeless tyres allow you to run lower pressures, giving more grip, less rolling resistance, and a more comfortable ride.
3. Double wrap your bars

© GCN
Thick, double-wrapped bar tape absorbs road buzz
Riding all day on rough, chattery gravel can put a lot of strain on your hands, wrists and shoulders. To take the edge off, consider double wrapping your bars with bar tape. It’ll give you an extra couple of millimetres of squish on the front end of your bike, which should reduce fatigue and increase comfort.
This is a tip we often see the pros deploying in the spring classics. As the pro peloton takes on the bumpier races of the year – the likes of Paris-Roubaix, the Tour of Flanders, and Gent-Wevelgem – team mechanics sometimes double wrap bars to reduce road noise on the cobbles.
4. Use MTB pedals and shoes

© GCN
Mountain bike pedals are easier to clip into, and the shoes are easier to walk in
Often, when riding gravel or off road, you end up getting off and walking. Sometimes the climbs are too steep; sometimes the descents are too rough for a road bike; sometimes you have to climb over a stile or get through a gate.
With road bike cleats, which protrude from beneath the sole of the shoe, these manoeuvres become pretty tricky. The slippery plastic sole offers little traction, and is uncomfortable for walking any more than a minute or two. Perhaps more annoyingly, with all that walking, you’ll wear down the plastic cleats in no time.
Switching to mountain bike shoes and pedals can make walking far easier. Mountain bike pedals use a recessed cleat, so you can walk relatively normally in the shoes, and usually have tread patterns that are designed for getting traction on muddy terrain. As well as being protected from striking the ground, the cleats themselves are made of metal, giving them a far longer lifespan than road bike cleats.
Mountain bike pedals are easier to manage off-road. Unlike the majority of road bike pedals, you can clip into mountain bike pedals on both sides, meaning you can focus on riding the terrain, not fumbling around trying to get your feet clipped in. And unlike road pedals, they’re designed to work even when they’re gummed up with mud and grime.
Read more: Mountain bike vs road pedals: which should you choose?
5. Protect the frame and paintwork

© GCN
Frame stickers protect the frame and paint from scratches and knocks
Your chain will be bouncing up and down as you rumble over rough surfaces. Without a clutch mechanism to control it, it’ll slap repeatedly against your chainstay, damaging your paint and possibly even your frame.
To protect your bike from harm, make sure you wrap your chainstay in something protective before you head out on the gravel roads and trails. Helicopter tape might work for a while, but for a sturdy, long term solution, a strip of old inner tube is ideal.
There are loads of chainstay protectors on the market, but for a DIY solution, cut a strip of inner tube and wrap it around your chainstay just like you would with bar tape, sealing the end with tape or a zip tie. If done well, this can look surprisingly neat.
Next, have a think about protecting the downtube. There’s a good chance that rocks will fly up from your front wheel and chip the paint on the underside of your downtube, so make sure you cover it with some protective tape. There are loads of purpose built frame protection decals out there, or you can use helicopter tape.
6. Swap in a larger cassette

© GCN
A wider range cassette with a lower gear range will help on steep climbs
On a gravel ride, the speeds are lower and the climbs are steeper. That’s why gravel bikes come with lower gear ratios than road bikes, with smaller chainrings and larger cassettes. Before you take on any epic gravel rides on your road bike, it’s a good idea to lower your gearing. The cheapest and simplest way to do this is by swapping your cassette to a larger one. Most road bikes come with an 11-28 cassette, but have the capacity for an 11-32 or even 11-34 cassette.
Before you splash out on a new cassette, check the specifications of your drivetrain, especially of your rear derailleur. Most derailleurs have a specified range of capabilities, determined largely by the length of the lower derailleur arm. Once you’re happy with spec and compatibility, we’d advise you to get the biggest cassette your derailleur can fit.
Read more: How to change the gearing on your bike

.jpg?rect=957,780,3097,3060&w=600&auto=format)


Related Content
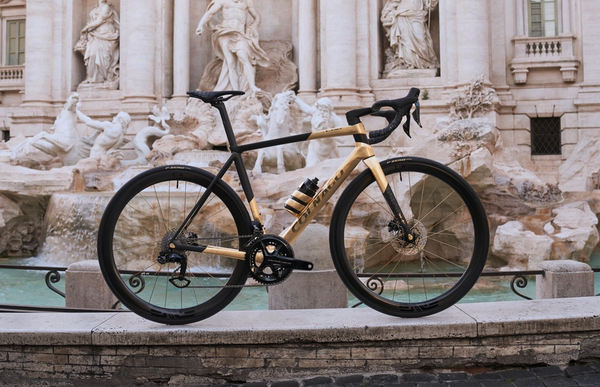
This one-of-a-kind gold leaf Colnago V4Rs ‘Gioiello’ is heading to auction
The bike was a test piece for the Gioiello collection that was ultimately created using the C68 frame

Giro d'Italia TT tech: Limar joins growing helmet trend with new bulbous Alien lid
The design of the wide time trial helmet leads to an energy saving of 10 watts over its predecessor, according to Limar
.jpg?w=600&auto=format)
Rudy Project officially unveils Wingdream helmet ready for Giro d’Italia time trial
It caused a stir when it was first spotted in the WorldTour peloton earlier in the year, but Rudy has now confirmed details for its time trial helmet, including what it claims are big performance gains

How much does bike technology really boost performance? - GCN Tech Show
Alex Paton and Ollie Bridgewood look at how the tech behind Van Rysel bikes might be driving more success in the pro peloton