Difficulty
Easy
How to wrap handlebar tape on a drop bar bike
Ollie Bridgewood goes through all the tips and tricks to get the perfect bar tape
GCN
The GCN team

Oliver Bridgewood
GCN Tech Presenter
PhD Chemist turned cycling enthusiast, bringing the lab coat to GCN Does Science
There are several different ways of wrapping bar tape, but we think this is the best. Follow Ollie Bridgewood's steps to make your bar tape comfortable, secure and long-lasting.
We'll show you how to do this in the steps below, but the most important thing to note when wrapping your bars is the direction you wrap each side. When you put your weight on your hands in the drops, it twists the bar tape. Do it the wrong way, and the bar tape will loosen as you ride. To prevent this, on the right side, wrap it clockwise from the end of the bar, and on the left side, wrap it anti-clockwise.
To replace your bar tape, you'll need some new bar tape, some electrical tape, and something to cut the tape with. Either a box knife or pair of scissors will do.
Read more: How to change integrated handlebars
How to Steps
Remove old bar tape and inspect your handlebars
Fold back the hoods
Cut two pieces of electrical tape and stick them to the top tube
Begin wrapping the right side
If you are using a bar end plug, insert it
If you have a Di2 junction box, mark the tape and trim it diagonally
Wrap the bar consistently, right up to the shifter
Navigating the shifters
Wrap once more below the shifter
Insert the covering piece, if you prefer
Wrap over the top of the shifter
Continue wrapping in this direction
To finish off the tape, wrap past the point, then mark and cut the tape
Secure the bar tape with electrical tape
Repeat for the left, this time starting anti-clockwise
Tools Needed
Step 1
Remove old bar tape and inspect your handlebars
First, remove your old bar tape by unwinding it from the bars. Once it's removed, clean any bits from the old tape off the bars and inspect the bars for any damage. Make sure the cable outers and brake hoses are in good condition too. This is a good opportunity to change cable outers that are worn or frayed.
Top Tip
This is a good time to change your lever position, if would like to adjust them.
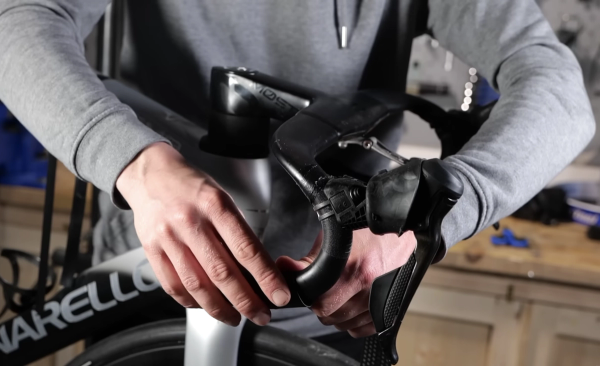
Step 2
Fold back the hoods
Fold back the hoods of the lever so the base of the lever – the part that connects with the handlebars – is revealed.
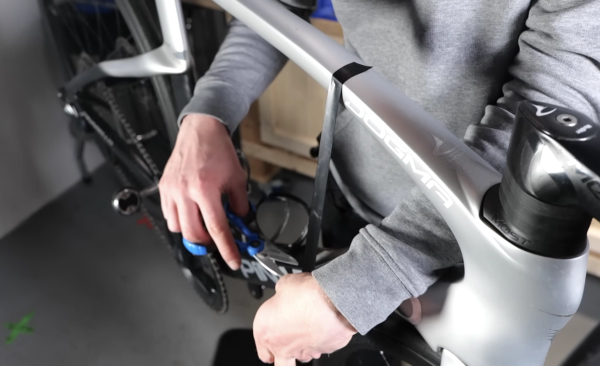
Step 3
Cut two pieces of electrical tape and stick them to the top tube
Cut two pieces of electrical tape about 30cm long and stick them to the top tube. They'll come in handy later.
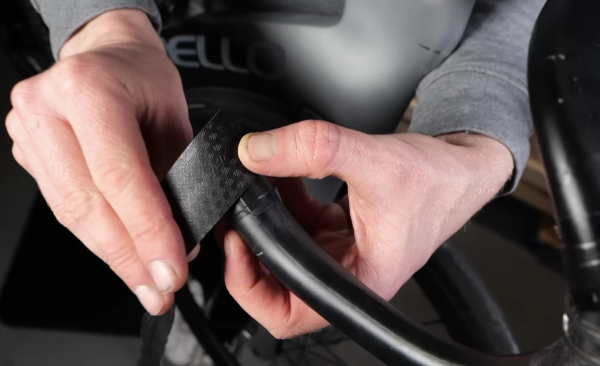
Step 4
Begin wrapping the right side
Start wrapping the right-hand side by placing the tape so it is half on the end of the bar, and half hanging off. Hold the tape taught, stretching it slightly, and wrap it clockwise around the bar.

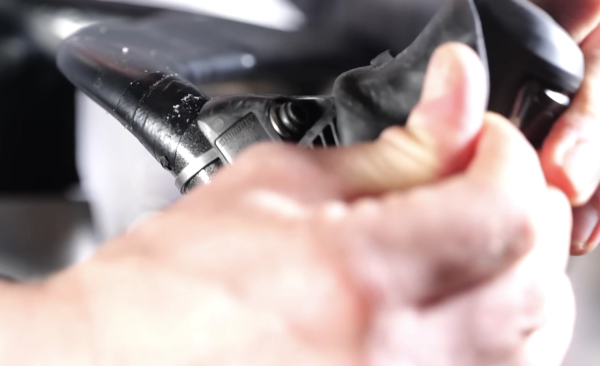
Step 5A
If you are using a bar end plug, insert it
If you are using a normal bar end plug, you can secure the end by pushing the plug in, forcing the excess tape into the bar.

Step 5B
If you have a Di2 junction box, mark the tape and trim it diagonally
If your bar end is a Di2 junction box, score the excess wrapped tape with a box cutter knife, then unwind the tape. Cut it along the scored line, then rewrap so the bar end sits flush to the Di2 junction box.
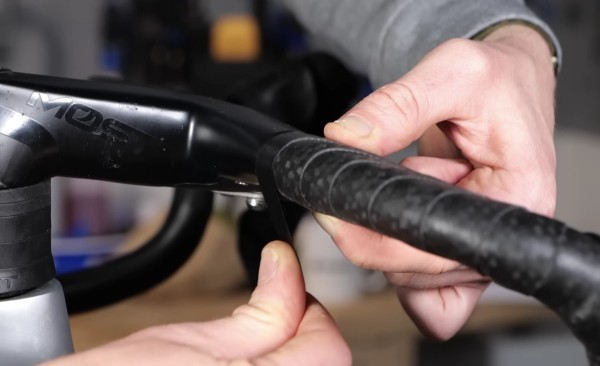
Step 6
Wrap the bar consistently, right up to the shifter
Wrap the bar consistently, applying constant tension to the tape and keeping the amount of overlap between each piece as uniform as possible.
Top Tip
If you do find you've left a gap or an uneven section, simply unwrap the tape and do it again.
Step 7A
Navigating the shifters
Typically, people do a 'figure of eight' to wrap the shifters, but with modern, thick bar tape, that can be too bulky. We prefer this method, which uses less tape, is less bulky, and leaves your bar tape rotated in the correct direction to wrap the tops securely.
Step 7B
Wrap once more below the shifter
Close the gap between the tape and the shifter with one more wrap. Use this wrap to cover as much of the exposed handlebar near the shifter clamp as you can.

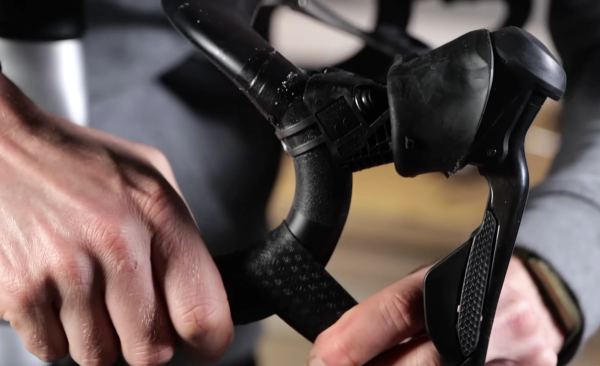
Step 7C
Insert the covering piece, if you prefer
Our shifter wrapping method can leave a small gap. It's fine to leave it, but some find it unsightly. If you'd rather not have a gap, use the two small pieces of bar tape that came with the rolls to cover the bar around the shifter clamp. Trim it to size and wrap over the top of it to hold it in place.
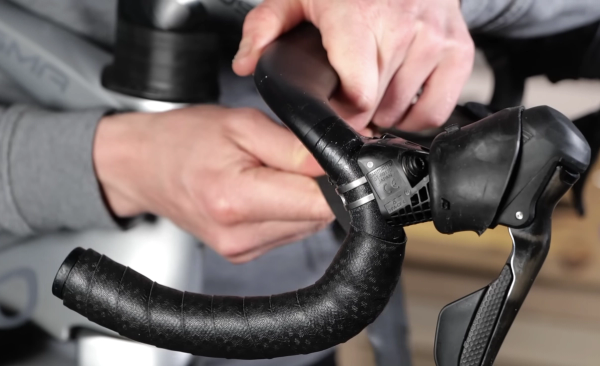
Step 7D
Wrap over the top of the shifter
From the inside of the handlebars, pull the tape up and over the shifter, then wrap it around the bars. Try and pull it as far down as you can, to close the gap and cover the exposed handlebar near the shifter clamp.

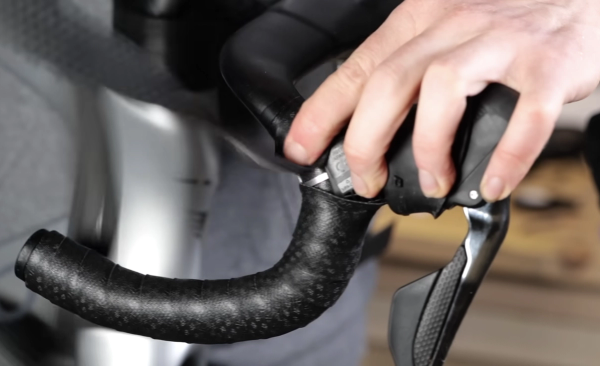
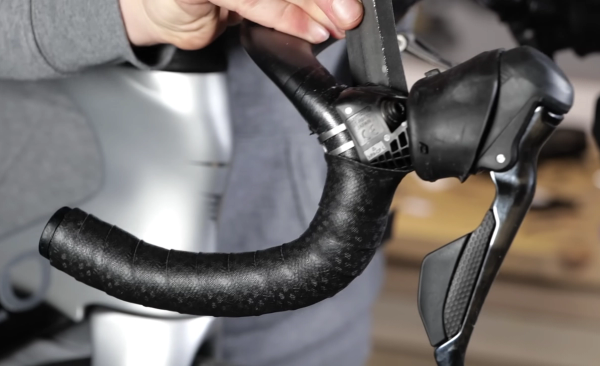
Step 7E
Continue wrapping in this direction
Now, simply keep wrapping in this same direction; no need for any more loops around the shifter. Wrap consistently until you've covered the tops.
Step 8
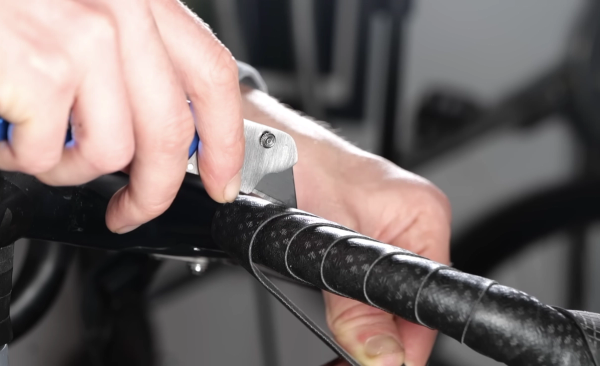
To finish off the tape, wrap past the point, then mark and cut the tape
Once you're happy with how your tape looks, you can finish it off. Wrap past the point you'd like it to end and mark the tape so you can then cut it diagonally. This will allow you to get a clean, consistent end to the wrap.
Top Tip
Finish the bar tape underneath the bar so the end is neat and out of sight.
Step 9
Secure the bar tape with electrical tape
Secure the tape in place with electrical tape. Wrap it around the bar tape carefully, keeping the tape tight without stretching or deforming it. A couple of revolutions around the bar will be plenty. For a super tidy finish, trim the tape so it finishes on the underside of the bars.
Top Tip
To make the electrical tape extra secure, heat up a pick or thin screwdriver and 'weld' the end of the tape down.

Step 10
Repeat for the left, this time starting anti-clockwise
The process is mirrored for the left. Start by wrapping the bars anti-clockwise. When you get to the shifter, make sure that when you do step 7d, when you go 'up and over' the shifter, it is on the inside of the bars. That way, when you carry on to the tops, the bar tape will be wrapped the same way for both the left and right.
Jargon Buster

GCN's Essential Road Bike Maintenance
For road, gravel, commuter and hybrid bikes, Essential Road Bike Maintenance is intended to be a proper bible to all those essential bike maintenance, repairs, and set-up tasks that we all need to know. Everything from basic bike set-up, how to get your wheels on and off, through setting up gears, bleeding brakes, and beyond to things like installing electronic gears, converting to a 1x transmission and more. In a nutshell, pretty much everything you would want to tackle on your bike (or bikes, plural) yourself. And then some. Like bike set up tips for taller and shorter riders; bottom bracket standards explained; common bike maintenance mistakes and how to avoid them; essential roadside fixes to keep you riding; how to make your bike more comfortable; how to puncture-proof your ride and much, much more. “A huge amount of knowledge, hacks, and know-how to help improve both your workshop skills and your ride” – Ollie Bridgewood, GCN Presenter Each chapter is structured with the tasks you’ll most likely need more of the time at the start (like how to adjust your gears, replacing brake pads, or changing a tyre), before running through to those that you’ll do much more infrequently (such as changing disc brake hoses, servicing a freehub or pedals, and so on). This also means that many of the tasks naturally ratchet up in difficulty as you go through each chapter which should also mirror your natural progression as you become more mechanically capable and confident. In short, 260 pages packed with all the essential knowledge you’ll need to confidently take on and complete pretty much any bike maintenance task. Get Some ‘Show-How’ With Your ‘Know-How’ Each walkthrough is linked to a companion video which you can watch for free from your computer, tablet or smartphone. To watch, either type in the walkthrough’s short-link URL – e.g. https://gcn.eu/GetPerfectShifting – into your browser, or scan the QR code with your smartphone or tablet so you can get the best of both worlds: know-how and show-how. Simple. All you need to know to fix your bike. Product Details: Pages: 260 (120sm) Size: 280mm (h) x 216mm (w) (portrait) Cover: Paperback Cover Finish: 300gsm, silk stock with anti-scuff matte laminate and spot UV gloss finish Please note: There may be some additional shipping charges for orders consisting of 2 or more books. However, our customer service team will contact you after you have placed the order to advise on delivery options. Click here to explore all GCN best selling books

Related Content

How to wax a bike chain
Waxing a chain is more complicated than applying lube but it's worth the extra effort

Beginner indoor training session: 20-minute sweet spot indoor cycling workout
If you're new to indoor training, this is a good session to start with. No super hard efforts or high cadences, just a good, entry-level session that will burn calories

How to change the stem on a road bike
A new stem can transform the fit and feel of a bike. Here’s how to replace a stem on a road bike

Take it easy! 25-minute aerobic indoor cycling workout
A steadier workout for low-intensity days, or for building into your indoor cycling gradually