Difficulty
Easy
How to shorten a chain with a chain tool
If you’ve swapped to a new chain, cassette or chainring, you may need to shorten your chain. Here’s how to complete the job on a chain with quick links
Tom Hallam-Gravells
Online Production Editor

Shortening a bike chain can be a daunting task, but it’s easy once you know what you’re doing. It’s an important step when you swap to a new chain, which will be longer than required, or if you change your cassette or chainrings.
All you’ll need for the task is a chain tool, like the Park Tool CT3.3 we used for this guide, plus a quick link tool.
For this example we’ve used a chain with a quick link. Quick links are so much easier to use than traditional joining pins, and they make it easy to take the chain off for cleaning.
- Read more: How to replace a bike chain
Tools Needed
Step 1
Remove the chain from the bike
This first step will only be necessary if you want to shorten a chain that is already on your bike. This would usually be because you’ve changed to a new cassette or chainrings.
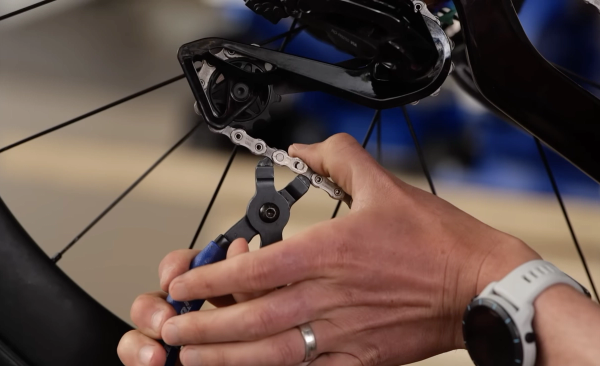
Locate the quick link on the chain and then open it up by squeezing the links together with some quick link pliers. Once detached, you can thread the chain off the bike.
Step 2
Work out how many links need to be removed
Work out how many links need to be removed from the chain. We've got a guide to help you find the correct chain length.
Remember that the quick link will add an extra half link once reattached. Remember too that the quick link adds an 'external' half, so you'll need to break your chain so that there is an 'internal' link on each end.
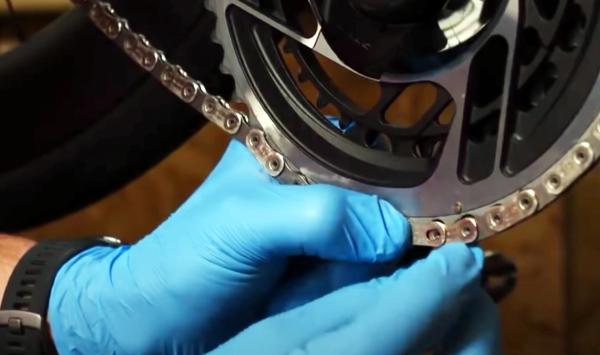
The links on a chain are held together with pins and you’ll need to remove the pin that is connecting the links you want to remove from the rest of the chain.
- Read more: How to calculate the correct chain length
Top Tip
On a chain there are both inner links, which underlap, and outer links, which overlap. You’ll need to ensure that you’re left with inner links on each end so that you can reattach the quick links.
Step 3
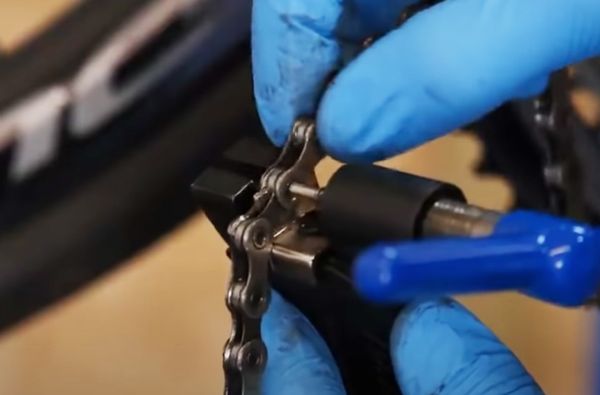
Attach the chain to the chain tool
Attach the chain to the chain tool, making sure that the pin you need to remove is lined up with the pin on the tool.
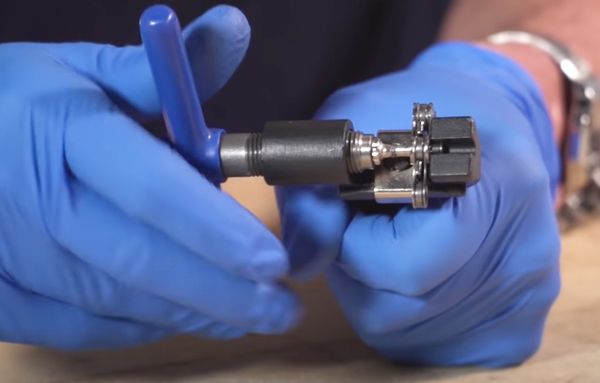
Step 4
Twist the handle to remove the pin
Whilst holding the chain tool firmly with one hand, use the other hand to twist the handle. This will slowly wind the pin on the tool outwards, simultaneously forcing the pin out of the chain. Be patient as it may take a little force.
Once the pin is detached, unwind the tool and then remove unwanted links.
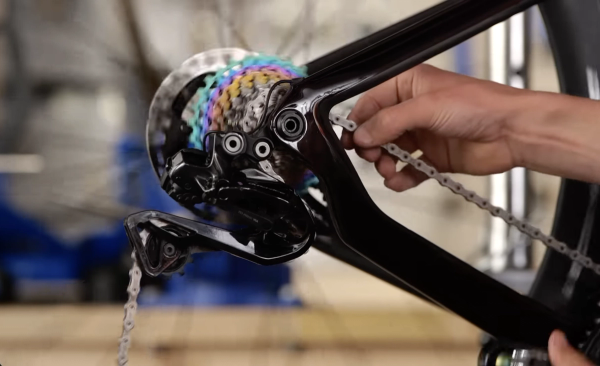
Step 5
Put the chain on the bike
Thread your chain back onto the chainset, making sure it is routed correctly around the derailleur - double check as you don’t want to attach the chain only to realise it has been incorrectly routed!
Pay particular attention to the tab between the two jockey wheels. Get your chain the wrong side of this, and it'll rub on it when the chain passes through the derailleur.
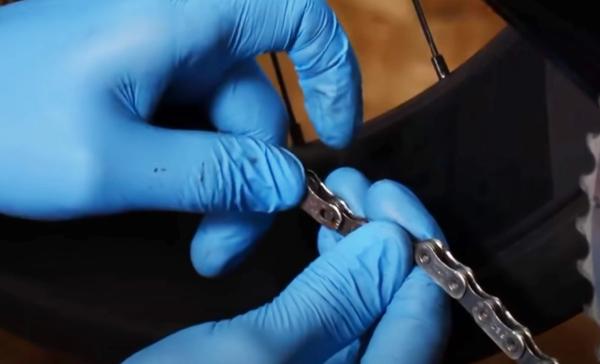
Step 6
Secure the chain with the quick link
Add a quick link to both ends of the chain and then join the two ends of the chain together. Use the pliers to pull the link into place.
.jpg?w=600&auto=format)
Related Content
How to calculate the correct chain length
A well-fitting chain is essential for proper shifting performance. Here’s how to get it right
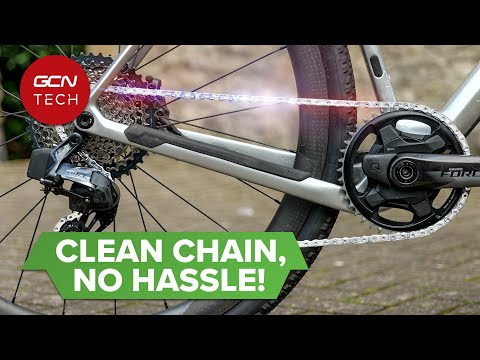
Easy and effective on-the-bike chain cleaning
The fastest way to clean your chain and drivetrain

Beginner indoor training session: 20-minute sweet spot indoor cycling workout
If you're new to indoor training, this is a good session to start with. No super hard efforts or high cadences, just a good, entry-level session that will burn calories

How to change the stem on a road bike
A new stem can transform the fit and feel of a bike. Here’s how to replace a stem on a road bike