Difficulty
Easy
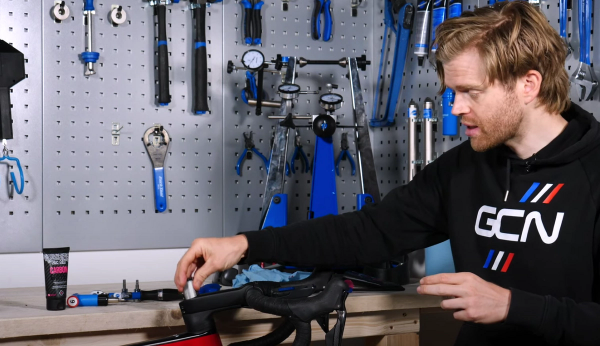
How to install a compression plug into a carbon steerer tube
A compression plug is an important part of a carbon headset. Here’s how to correctly fit one
Tom Hallam-Gravells
Online Production Editor


Many modern road bikes now have carbon forks, which come with compression plugs. Inserted into the top of the steerer tube, a compression plug acts as an anchor for the top cap bolt whilst also supporting the walls of the tube from the clamping forces of the stem.
It’s a really important component that needs to be fitted correctly to ensure that a bike is safe to ride and to prevent damage to the steerer tube. If you’re unsure how to complete the job, follow the step-by-step guide below for help.
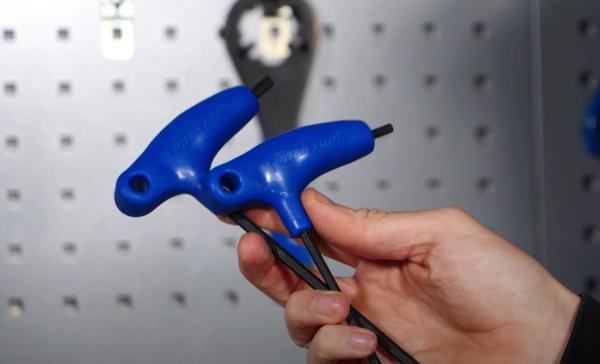
All you’ll need for the job is a torque wrench, plus Allen or Torx keys depending on the bolts on your stem.
- Read more: Five essential tools and spares for cyclists
Tools Needed
Step 1
Prepare for the job
For this job, we’ll presume that your bike doesn’t currently have a compression plug fitted and that the top cap has been removed.
You may also want to remove the stem, although it’s best to avoid this if you have internally routed cables that feed through the stem and headset. If you leave your stem on, make sure the bolts are loose before proceeding.
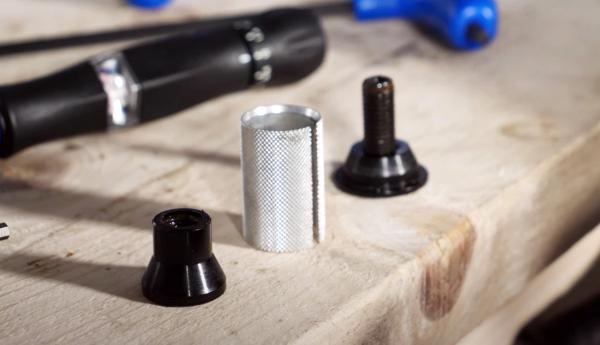
Step 2
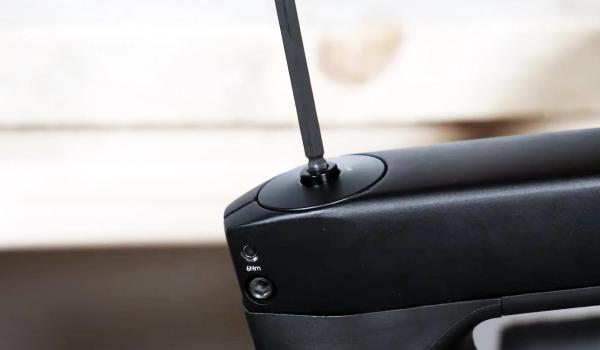
Disassemble the compression plug
Use a 5mm or 6mm allen key to unscrew the top bolt on the compression plug. Once disassembled, you should have a separate top cap, a bottom wedge and a metal sleeve which sits between the two.
Top Tip
Once the top cap and wedge are screwed back together, it causes the sleeve to expand, which is how the device clamps into the steerer tube.
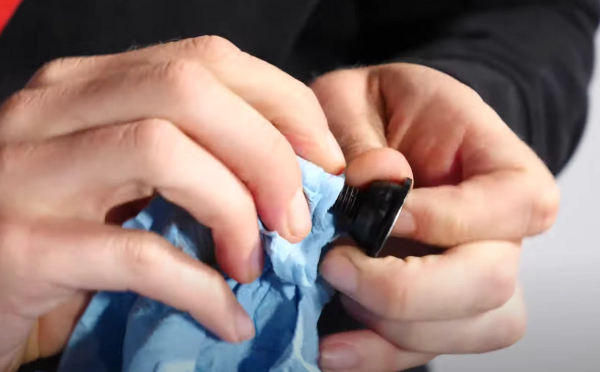
Step 3
Clean the compression plug
Give the bolt and wedge a thorough clean and apply grease to the threads on the bolt. Try to avoid getting any grease on the sleeve as this will cause it to slip once inserted into the steerer tube. You can, however, apply carbon paste to the sleeve as this will improve traction once it’s inserted.
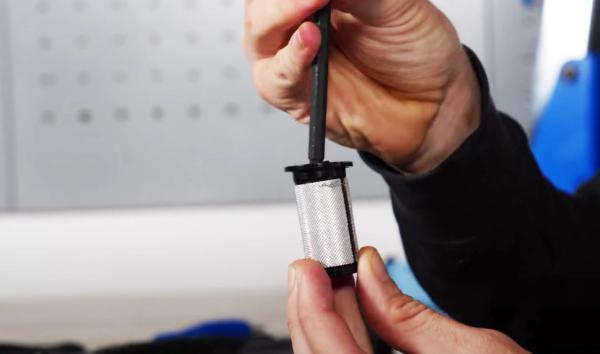
Step 4
Reassemble the compression plug
Insert the bottom wedge into one side of the sleeve and then insert the bolt to the opposite end. Screw the bolt to secure everything together until it’s finger tight.
For the plug to tighten correctly inside the steerer tube, there needs to be some resistance when you try to insert it. So, slowly tighten the bolt at small increments until it fits snuggly into the tube.
Top Tip
If the plug has to be forced into the steerer tube, the bolt is too tight.
Step 5
Insert the compression plug into the steerer tube
Insert the plug into the steerer tube and tighten the bolt using an allen key. Then finish the job with a torque wrench, ensuring that you follow the recommended torque limit. This is usually in the range of seven to eight Newton Meters, but always consult your bike’s owner’s manual for the exact number.
Top Tip
Always follow recommended torque limits otherwise you can damage the tube if you overtighten the bolt, while your headset won’t be secure if you underdo it.
Step 6
Tighten the top cap
Reattach the stem if you removed it, but don’t tighten the stem bolts just yet. Apply and tighten the top cap, once again tightening it to the recommended torque limit.
Finish by tightening the stem bolts to the correct torque.
Top Tip
Make sure the handlebars are aligned correctly with the frame before tightening the stem bolts

GCN's Essential Road Bike Maintenance
For road, gravel, commuter and hybrid bikes, Essential Road Bike Maintenance is intended to be a proper bible to all those essential bike maintenance, repairs, and set-up tasks that we all need to know. Everything from basic bike set-up, how to get your wheels on and off, through setting up gears, bleeding brakes, and beyond to things like installing electronic gears, converting to a 1x transmission and more. In a nutshell, pretty much everything you would want to tackle on your bike (or bikes, plural) yourself. And then some. Like bike set up tips for taller and shorter riders; bottom bracket standards explained; common bike maintenance mistakes and how to avoid them; essential roadside fixes to keep you riding; how to make your bike more comfortable; how to puncture-proof your ride and much, much more. “A huge amount of knowledge, hacks, and know-how to help improve both your workshop skills and your ride” – Ollie Bridgewood, GCN Presenter Each chapter is structured with the tasks you’ll most likely need more of the time at the start (like how to adjust your gears, replacing brake pads, or changing a tyre), before running through to those that you’ll do much more infrequently (such as changing disc brake hoses, servicing a freehub or pedals, and so on). This also means that many of the tasks naturally ratchet up in difficulty as you go through each chapter which should also mirror your natural progression as you become more mechanically capable and confident. In short, 260 pages packed with all the essential knowledge you’ll need to confidently take on and complete pretty much any bike maintenance task. Get Some ‘Show-How’ With Your ‘Know-How’ Each walkthrough is linked to a companion video which you can watch for free from your computer, tablet or smartphone. To watch, either type in the walkthrough’s short-link URL – e.g. https://gcn.eu/GetPerfectShifting – into your browser, or scan the QR code with your smartphone or tablet so you can get the best of both worlds: know-how and show-how. Simple. All you need to know to fix your bike. Product Details: Pages: 260 (120sm) Size: 280mm (h) x 216mm (w) (portrait) Cover: Paperback Cover Finish: 300gsm, silk stock with anti-scuff matte laminate and spot UV gloss finish Please note: There may be some additional shipping charges for orders consisting of 2 or more books. However, our customer service team will contact you after you have placed the order to advise on delivery options. Click here to explore all GCN best selling books
.jpg?w=600&auto=format)
Related Content

From box to bike – how to assemble a brand new bike
Here’s how to safely set up your new steed so you can ride with confidence
How to change integrated handlebars
Alex heads down to the Pinarello store in London to get his integrated bars and stem changed, showing you all the steps so you can complete the job too

How to wax a bike chain
Waxing a chain is more complicated than applying lube but it's worth the extra effort

Beginner indoor training session: 20-minute sweet spot indoor cycling workout
If you're new to indoor training, this is a good session to start with. No super hard efforts or high cadences, just a good, entry-level session that will burn calories