How to use road bicycle gears
We go back to basics on how and when to change gear on your road bike.
Tom Hallam-Gravells
Online Production Editor
.jpg?rect=957,780,3097,3060&w=600&auto=format)

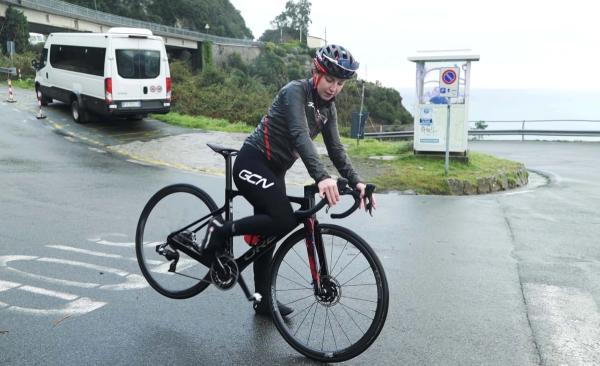
Your gears allow you to turn your pedals at a comfortable speed. Without easy gears, you'd grind to a halt when trying to go up steep hills and without bigger gears, you wouldn't be able to pedal fast enough when going downhill.
But how are we meant to use them? We’ve broken down the steps to using road bike gears. It might seem like a lot of steps now, but after a bit of practice, you’ll be changing gears without even thinking about it.

How do gears work?
There are two sets of gears on most road bikes, which are connected by the chain. Here's how to use each of them:

The cassette
First of all, we have the cassette, which is attached to the rear wheel. This is a collection of progressively larger cogs. Most bikes have somewhere between eight and 12 cogs, and changing between them gives us the ability to make subtle adjustments in the bike’s gearing.
On the cassette, the bigger cogs are easier, and the smaller cogs are harder.

The chainrings
Next, we have the chainrings, which are connected to the pedals. Bikes typically have one, two, or three chainrings. Changing between these gears causes a big change in pedalling speed, also called cadence.
To switch between the different cogs, we have the derailleurs – one at the back, and, if your bike has more than one chainring, one at the front too. These move side to side when you change gear, pulling the chain onto different cogs
The bigger gear is the harder one, and the smaller gear is the easy one.

How to change gear
Most modern road bikes have the gear shifters integrated into the brakes. And on each brake lever, there are two gear levers.
The first is the brake lever itself. By pushing the brake lever sideways towards the centre of the bike, you change the position of the derailleur and so change the gears.
The second is the smaller lever tucked behind the brake lever. By pushing this, you change the position of the derailleur in the other direction, which changes the gear in the opposite direction.
The most important thing to know is that your left brake lever changes the gears at the front, and the right brake lever changes the gears at the back.

Aim for 80-90rpm
We would recommend you aim for a cadence of about 80-90rpm (revolutions per minute), meaning you spin the cranks between 80 and 90 times in a minute. You can measure this with a cadence sensor, but ultimately it doesn’t really matter. As long as you’re spinning the pedals at a sensible speed and feel comfortable, you’re all good.

For a small adjustment, use the right lever
Most of the time, you’re going to be using the gear shifters on your right lever. These adjust the cassette on the back, where the difference between each of the cogs is quite small. By changing the gears with your right hand, you can make fine adjustments to your pedalling speed.
Push the small lever to move into a harder gear, and the larger lever to move into an easier gear.

For a big change in gear ratio, use the left lever
If you need a drastic change in gearing, say if you come across a hill, or maybe a big headwind, change gear with the left shifter. This changes the front cogs, which causes a big change in your pedalling speed. Think of it like a low range or high range gearbox. For flats and downhills, use the big cog – the ‘high range’ gears. On hills or headwinds, change into the small cog – the ‘low range’ gears.
Shift into the easier gear by pushing the smaller lever, and the harder gear by pushing the larger lever.
Top Tip
As you change between the front chainrings, keep pedalling, but back off the power slightly. This will reduce the pressure on the chain, allowing it to move across more easily.
Change into an easier gear before coming to a stop
If you’re coming up to a traffic light or a junction, think ahead. Before you stop, change into an easier gear so you can pedal away from a standstill without being overgeared.

Even out the gap between the front chainrings
Changing between the front chainrings can give you too much of a jump.
To make the gap less severe, change one or two gears on the rear cassette (using your right hand) at the same time. Make sure you change them in the opposite direction, so the rear cassette helps in levelling out that jump.
Sounds complicated, but in fact, it’s really easy: whichever lever you’re pushing on the left hand, push the equivalent one on the right hand.

Avoid cross-chaining
Cross-chaining is when your chain is stretched across your gears at an extreme angle. It’s caused by being in the opposite cogs on the front and the back. That could mean you’re in the big cog at the back and the big cog at the front, or similarly small at the back and small at the front. Doing this will put stress on the chain and on your components, which might lead to things wearing out quickly or even breaking under the strain.
To avoid cross-chaining, keep an eye on your gearing. If your chain is stretched across your cogs, you might need to change which front chainring you’re using (with your left hand), then readjust the rear cogs to find a comfortable gear.

Practice makes perfect
The best way to get to grips with your gears is to get on your bike and start trying them out. You’ll soon get a feel for what happens when you push each lever. With a bit of practice, changing gear efficiently will become second nature.
.jpg?w=600&auto=format)


Related Content

The full pyramid: 30-minute HIIT indoor cycling workout from GCN
A 30-minute HIIT workout for developing anaerobic fitness, led by Manon Lloyd

How to replace a gear cable on a road bike
A new gear cable can reduce friction and improve shifting. Here’s how to change a gear cable on a road bike

How to wax a bike chain
Waxing a chain is more complicated than applying lube but it's worth the extra effort

Beginner indoor training session: 20-minute sweet spot indoor cycling workout
If you're new to indoor training, this is a good session to start with. No super hard efforts or high cadences, just a good, entry-level session that will burn calories