Difficulty
Easy
How to fit and adjust a headset on a road bike
Your headset is the set of bearings that allow the steerer tube to turn in the frame. Here's how to remove, install and adjust them
Tom Hallam-Gravells
Online Production Editor


Your headset is the group of components that are nestled in your headtube. Together, they enable your fork to turn smoothly in your frame. In this guide, we'll first show you how to assemble a headset, and secondly, how to tension it correctly.
When set up correctly, there shouldn't be any play in a headset. To test your headset, pull the front brake with the bike on the floor, and rock the bike back and forth whilst holding the collar at the top of the headset with your finger and thumb. There shouldn't be any forward and back movement in the headset. If you can feel some movement in yours, you need to adjust it.
Thankfully, adjusting a headset is an easy job. Although you can use a simple set of allen keys, we'd recommend using a torque wrench to tighten stem and headset bolts. Over-tightened stem bolts can crush carbon steerer tubes, so use a torque wrench to tighten bolts without risking damage.
- Read more: How to change integrated handlebars
What is a headset?
‘Headset’ is the term used for the components fitted to the headtube of a bike that allow the steerer tube to rotate smoothly while also securing the fork in place.
A headset will usually consist of a lower and upper bearing, spacers, the stem, a top cap and a bolt to add preload and keep everything secure. There will also be an expander plug if your bike has a carbon steerer tube, or a star nut for metal tubes. These sit inside the steerer tube adjacent to where the stem is clamped.
Most modern road bikes use sealed cartridge bearings, where the ball bearings sit inside a sealed unit - this helps to keep the grease packed in, whilst keeping dirt outside. One of these is positioned at the top of the head tube and the other at the bottom, but they’re not interchangeable. Cartridge bearings also vary in size and you’ll need to use the correct size for your specific bike.
Here’s how all of these parts are assembled to form the headset and an overview of some of the issues you may encounter. We’ve started this guide with the headset already disassembled.
How to Steps
Assembling a headset
Insert the lower bearing
Insert the steerer tube through the head tube
Insert the upper bearing
Add collar and bearing top cap
Attach spacers and stem
Secure headset with top cap bolt
Tighten stem bolts
Adjusting the headset
Adjust stem bolt
Tighten stem after the top cap
Check the assembly
Check the bearings
Tools Needed
Step 1A
Assembling a headset
First of all, here are the steps for correctly assembling a headset.
Step 1B
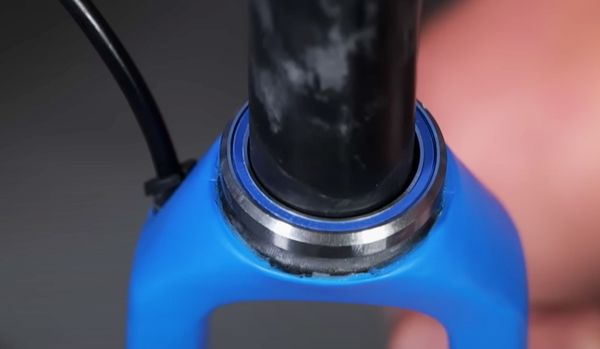
Insert the lower bearing
Slide the lower bearing over the steerer tube and onto the top of the fork. The tapered face on the inner race of the bearing is designed to fit onto the angle that is tapered onto the top of the fork.
If the bearing doesn’t fit onto the top of the fork, you may have inserted the bearing the wrong way round.
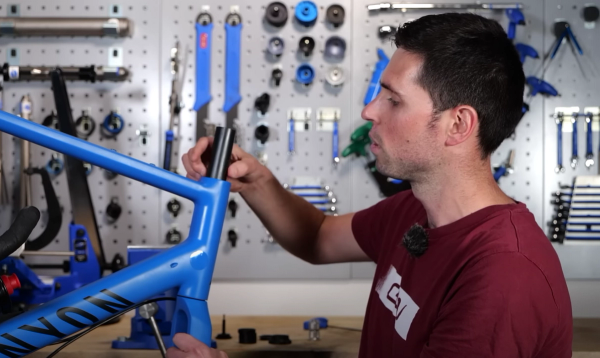
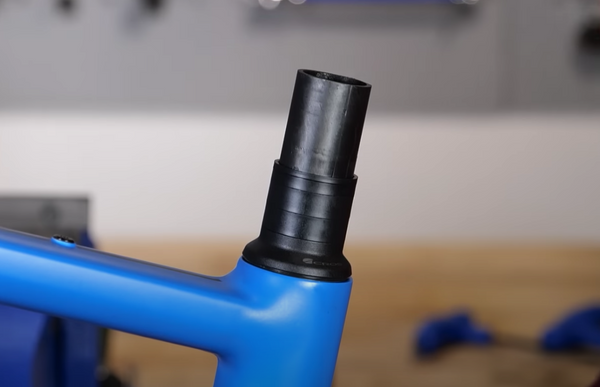
Step 1C
Insert the steerer tube through the head tube
Slide the steerer tube through the bottom of the head tube. Once fully inserted, the lower bearing at the top of the fork should slot into the bottom of the head tube.
Step 1D
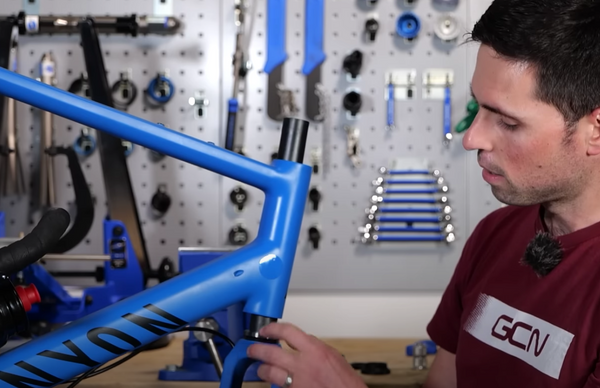
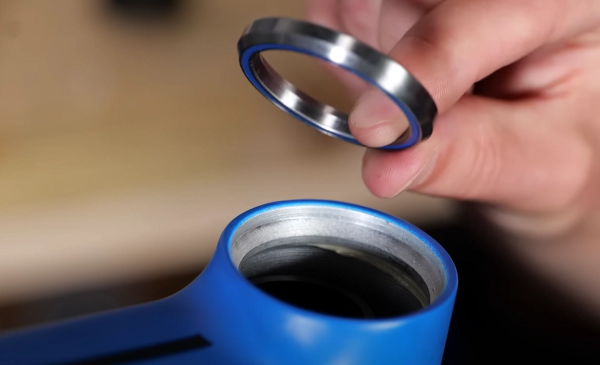
Insert the upper bearing
Slide the upper bearing over the steerer tube and place it into the top of the head tube. The bearing needs to be inserted the correct way round and should sit flush inside the top of the head tube.

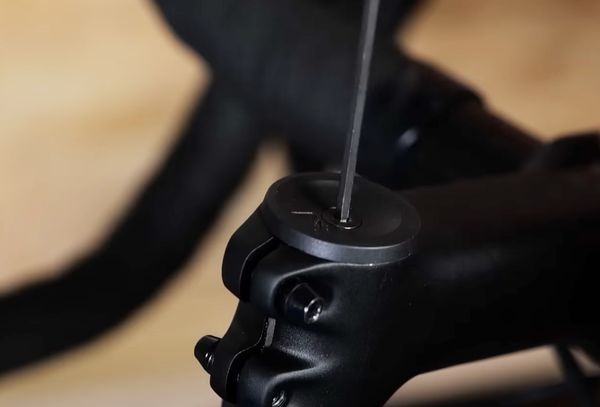
Step 1E
Add collar and bearing top cap
Slide the collar/compression ring onto the top of the bearing and then add the bearing top cap.
This sits on top of the bearing to provide another layer of protection.
Step 1F
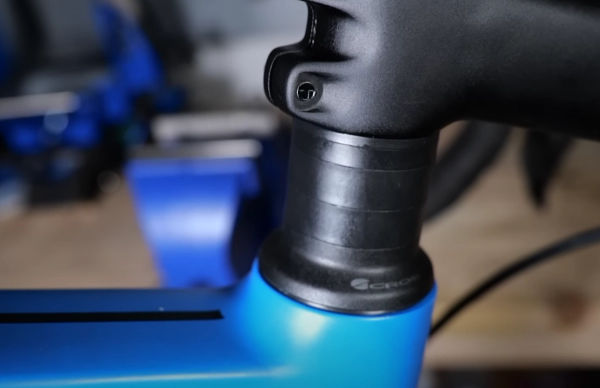
Attach spacers and stem
Insert the spacers over the steerer tube. These will affect how high the handlebars are, so make sure you use the correct number.
Once you’re happy, slide the stem onto the steerer tube, but don’t tighten the bolts yet.
Regardless of whether you decided to use lots of spacers or none at all, you need to make sure there are enough spacers covering the steerer tube, with an excess of about five millimetres on the top. This is so you can tension the headset correctly in the next step.
Step 1G
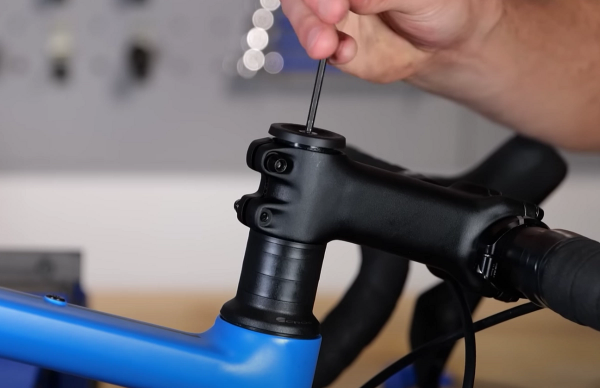
Secure headset with top cap bolt
Presuming the expander plug or star nut are already in place, attach the top cap and bolt and secure everything together to the recommended torque limit. Getting the torque right is important. The top cap applies preload to the whole system, removing any unwanted play in the bearings. You want the fork to turn freely and smoothly in the frame, but any movement in the collar of the headset suggests the system is too loose.
Top Tip
If you have removed the expanded plug or star nut and need to re-attach it, check out our guide here.
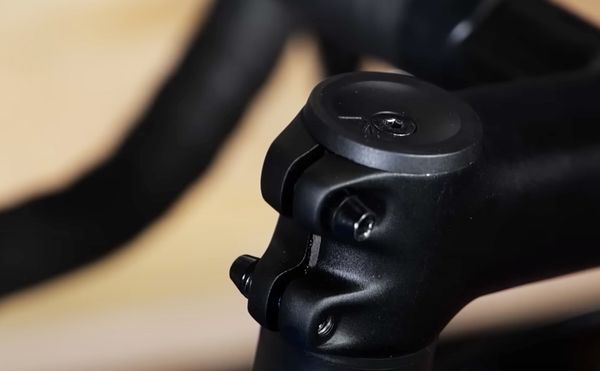
Step 1H
Tighten stem bolts
Finish by securing the stem clamping bolts, but be careful not to exceed the recommended torque limits. This will usually be indicated near the bolts on the bike or can be found in the bike’s handbook.

Step 2A
Adjusting the headset
If your headset is already assembled, you may need to make some adjustments to remove any play.
You can identify if there is any play in your headset by holding the front brake lever and rocking the bike backwards and forwards, with the stem bolts loose. Hold the bike around the bearings to feel for any play and listen as it will sometimes make a small knocking sound.
If there is any play, it will often only require small adjustments.
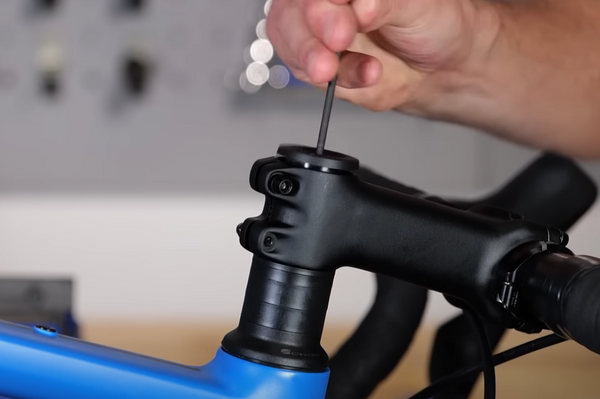
Step 2B
Adjust stem bolt
Usually, there will be play because the top cap bolt isn’t tight enough.
With the stem bolts loose, use an allen key to further tighten the top cap bolt. Only tighten it incrementally, checking each time to see if it has removed the play. Be careful not to exceed the recommended torque limit.
If there is still play once you’ve reached the torque limit, there may be another issue. Here's how to resolve the most common issues:
Step 2C
Tighten stem after the top cap
Make sure that you secure the top cap before tightening the stem bolts, otherwise it won’t be able to preload the headset.
Step 2D
Check the assembly
Double check everything was correctly assembled. You may have placed a bearing the wrong way round.

Step 2E
Check the bearings
If everything is assembled correctly and you’ve followed the above process, the play may be caused by worn bearings which may need replacing.
If the bearings aren’t the problem and the headset appears to be assembled correctly, it’s best to take your bike to a local bike shop for further investigation.
.jpg?w=600&auto=format)
Related Content
How to change integrated handlebars
Alex heads down to the Pinarello store in London to get his integrated bars and stem changed, showing you all the steps so you can complete the job too
How to fit and set up Shimano road bike hydraulic disc brakes
Hydraulic discs offer brilliant all-weather braking control but fitting them can be a daunting prospect. Here’s how to get it right first time

Take it easy! 25-minute aerobic indoor cycling workout
A steadier workout for low-intensity days, or for building into your indoor cycling gradually

Intense interval blast: Hank's 15-minute indoor cycling workout
A short blast of 30-second sprints for burning calories and building muscle as quickly as possible