Difficulty
Medium
How to bleed Shimano road hydraulic disc brakes
If your hydraulic disc brakes have started to feel mushy or imprecise, then you need to bleed them.


How to Steps
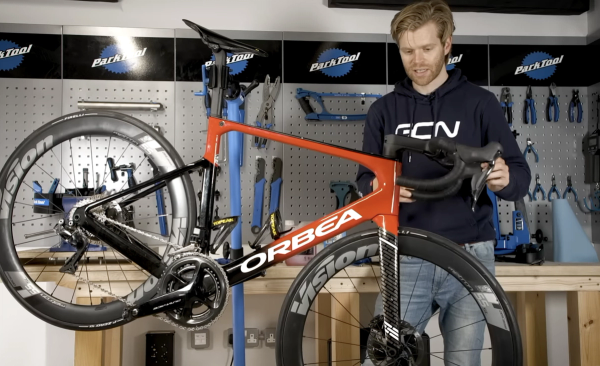
Get the bike ready
Reset the pistons
Remove the pads
Insert the bleed block
Protect your hands and bike from mineral oil
Open the lever bleed port
Fit the reservoir
Attach the syringe
Open the calliper bleed port
Remove the plunger from the reservoir
Push through the mineral oil
Close the calliper bleed port
Suck out any bubbles
Remove the reservoir and replace the bleed port bolt
Refit the pads
Install the front wheel
Centre the callipers
Tools Needed
Step 1
Get the bike ready
If you’re bleeding the front brake, put the bike in a work stand angled slightly down to stop the forks from moving around. When you’re working on the rear brake, angle the bike upwards to help with bubble flow and use a strap or similar to secure the bars. We’ll just concentrate on the front wheel for now though.

Step 2
Reset the pistons
Remove your front wheel, then reset the pistons by pushing them gently back into the calliper with a pad spacer tool or a big, flat screwdriver. You don’t want to go in too hard and gouge the brake pads as you can easily damage them.

Step 3
Remove the pads
With the pistons reset, remove the brake pads to stop them getting ruined by any spilt fluid. First remove the little clip on the right-hand side and then undo the retaining pin with the flathead screwdriver.
Top Tip
With your pads out it’s a good opportunity to inspect them for wear and see if you need new ones. Fresh pads always make the system easier to set up anyway, so if in doubt, install a new set later.

Step 4
Insert the bleed block
Insert your bleed block into the calliper to hold the pistons in place. Secure it with the retaining pin that usually holds the brake pads.

Step 5
Protect your hands and bike from mineral oil
Peel back the shifter hood. Before you open up the hydraulic system, protect your hands by putting on some gloves, and protect your hoods by placing a rag around the port to catch any spills.

Step 6
Open the lever bleed port
Undo the bleed port screw on the top of the shifter body. It’s quite easy to round these out, so ensure to use a good quality, undamaged Allen key. Make sure you keep the bleed port screw somewhere safe.

Step 7
Fit the reservoir
For most Shimano brakes, before you can fit the fluid reservoir, you’ll need to fit a small adaptor. Screw it into the top of the bleed port. Once that’s fitted, take the fluid reservoir from your bleed kit and screw it into the top of the adapter.

Step 8
Attach the syringe
Half-fill the syringe in your bleed kit with the hydraulic mineral fluid, then take the little rubber dust cover off the bleed port on the brake calliper. Push the syringe hose onto it, and lock it into place with the collar.

Step 9
Open the calliper bleed port
Use your 7mm spanner to undo the calliper bleed port a quarter of a turn.

Step 10
Remove the plunger from the reservoir
Before you depress the syringe, remove the stopper from the reservoir.

Step 11
Push through the mineral oil
Gently depress the syringe to push the fluid through the system. Don’t push too hard as this can cause it to leak. You should see air bubbles coming out of the system and into the reservoir. Continue to push fresh fluid through until the bubbles stop or you only have 10ml or so left in the syringe.
Step 12
Close the calliper bleed port
Tighten the calliper bleed port with the 7mm spanner. Then, pull back slightly on the syringe plunger while removing it to reduce spillage. Clean up any oil with a rag or paper towel – any remaining oil could contaminate the the pads.

Step 13
Suck out any bubbles
Now stick the syringe hose carefully into the fluid reservoir at the lever end and see if you can suck any stubborn bubbles out of the system from the top end. Once you’ve sucked any final bubbles out of the system, remove the syringe, and plug the fluid reservoir with the plug pin.
Top Tip
Tapping the brake hose from the brake end up to the lever end can help detach air bubbles stuck to the sides of the brake or hose and ‘burp’ them up to the top.

Step 14
Remove the reservoir and replace the bleed port bolt
With the plunger in the reservoir, unscrew it from the bleed port and place it to one side. Then, replace the bleed port bolt. Clean up any spilt fluid, then fold the hood back into place.

Step 15
Refit the pads
Remove the piston spacer and refit the pads. Slide them into place and screw in the retaining pin. Make sure to put the safety clip on the end of the retaining pin.

Step 16
Install the front wheel
Attach the front wheel to the bike. If you don't have a thru-axle, it's wise to put the bike on the ground to make sure the wheel is centred in the dropouts.

Step 17
Centre the callipers
Loosen the calliper bolts slightly, just so the calliper can move around on the frame. Then, pull the brake, and tighen the calliper bolts as you hold the brake closed. This should centre the calliper around the disc.
Related Content

How to replace a gear cable on a road bike
A new gear cable can reduce friction and improve shifting. Here’s how to change a gear cable on a road bike

How to wax a bike chain
Waxing a chain is more complicated than applying lube but it's worth the extra effort

Beginner indoor training session: 20-minute sweet spot indoor cycling workout
If you're new to indoor training, this is a good session to start with. No super hard efforts or high cadences, just a good, entry-level session that will burn calories

How to change the stem on a road bike
A new stem can transform the fit and feel of a bike. Here’s how to replace a stem on a road bike