Difficulty
Easy
How to repair a punctured TPU inner tube
TPU tubes can be expensive, so taking the time to fix punctured ones can save you plenty of money. Here’s how
Tom Hallam-Gravells
Online Production Editor


TPU inner tubes are a relatively new addition to the world of cycling and, like many newer products to the market, their introduction has been driven by performance. Compared to a standard butyl tube, they are incredibly lightweight, often by over 100g per tube. That may not sound like much, but cyclists pay hundreds, and sometimes thousands, of pounds to upgrade other components, like their wheels, simply to shave that amount of weight.
It’s perhaps not surprising, then, that TPU tubes also pack a much higher price tag than their butyl cousins, which is usually over £30. Considering the weight saving, that’s actually a relatively low price, but it soon stacks up if you suffer from punctures.
Up until recently, cyclists were advised against repairing punctured TPU tubes, but that’s now changed, which is great news for our bank accounts.
Here’s how to quickly and easily fix a punctured TPU inner tube. For this example we've used a Pirelli inner tube and repair kit, but the process is the same for any other TPU tyre. To complete the job you’ll need tyre levers, a TPU-specific puncture repair kit - this is important as a standard repair kit for butyl tubes won’t work - a pump and a bowl of water.
Step 1
Remove the inner tube from the tyre
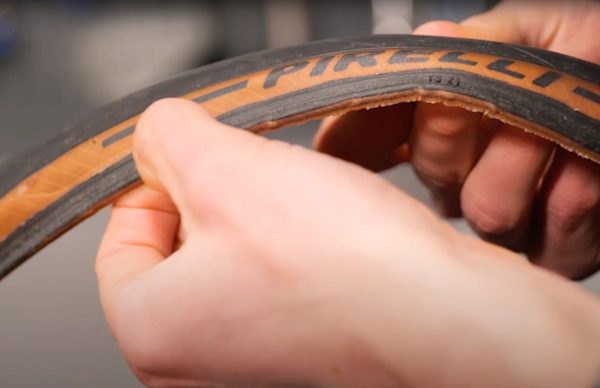
Take the wheel off your bike and then detach the tyre - you may need tyre levers for this - and remove the inner tube.
- Read more: How to change a tyre on your road bike
Check the tyre for damage. If you find any sharp objects, carefully remove them. For larger holes or cuts, you may need to replace the tyre.

Step 2
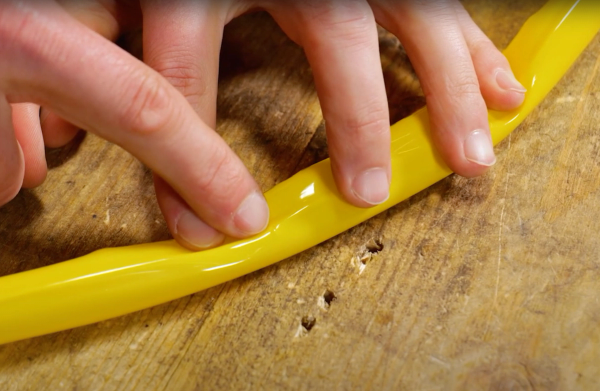
Locate the puncture
Next, you need to locate the puncture on the inner tube. If there is clear damage on the tyre, the corresponding area on the inner tube is likely to be the affected area.
Things won’t always be this obvious and you may sometimes need to investigate a little further. You can usually identify a puncture by slightly inflating the inner tube and then listening for the sound of air escaping.
If this doesn’t work, submerge the tyre in water and look for bubbles, which will lead you to the punctured area.
Top Tip
Deflate and dry the inner tube before moving onto the next step.
Step 3
Decide whether the tube can be repaired
Unfortunately, not all punctures can be repaired. Most smaller holes can, but we’d advise against trying to fix larger holes which could fail, causing your tyre to lose air almost instantaneously - which is not something you’d want to experience out on the road.
Size up the extent of the puncture and decide whether it can be repaired. If in doubt, it’s best to err on the side of caution.
Top Tip
Sometimes TPU tubes leak air from their valve or the glued joints. These areas can’t be repaired.
Step 4
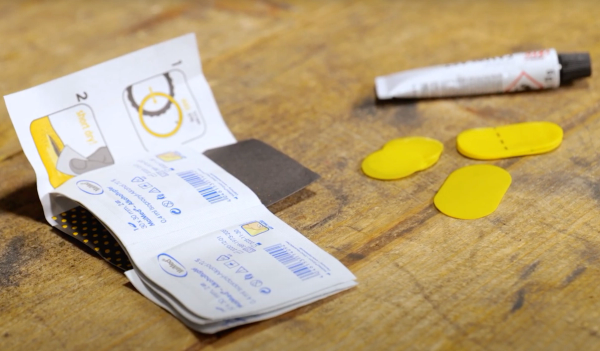
Choose the right patch
Most repair kits will come with multiple patches, so choose the relevant size. For example, Pirelli’s repair kits have four different patches.
Always use a TPU-specific patch kit rather than a standard option. These have special adhesives designed for the material and the patches are made from TPU.
Step 5
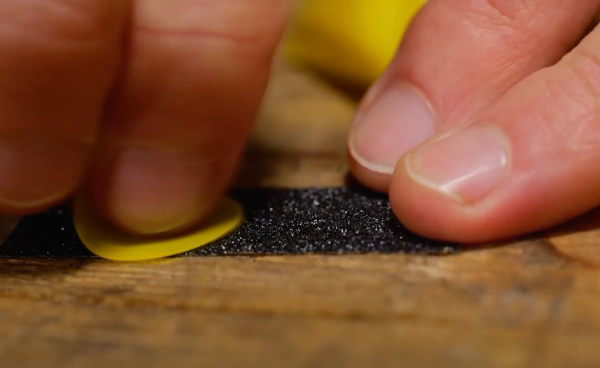
Rough the surfaces
Gently roughen the surfaces on the tube and patch that you are going to glue together. Your patch kit should contain a small tool for this.
Clean both areas with an alcohol wipe, which should also be contained in the kit.
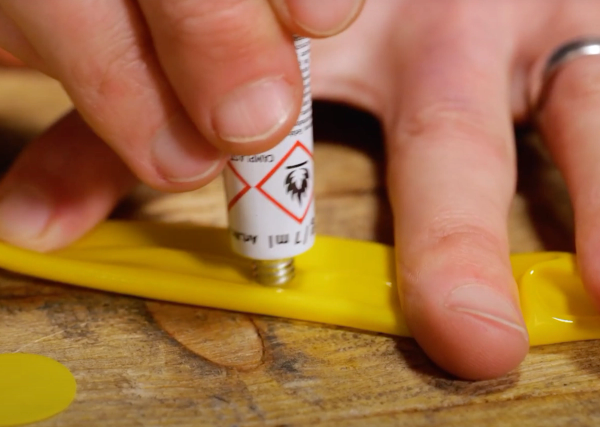
Step 6
Apply the glue
Apply a thin layer of glue to the tube and wait a couple of minutes for it to go tacky.
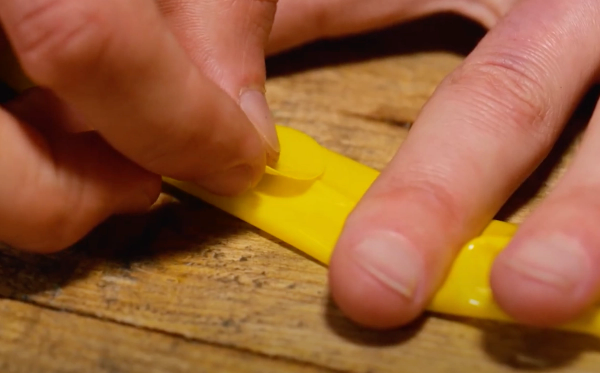
Step 7
Apply the patch
Apply the patch on top of the glue and press firmly down, ideally on a flat surface. Wait a couple of minutes for it to dry and then check to make sure that the edges of the patch are firmly stuck to the tube.
Step 8
Inflate the tyre
Once you’re confident it is stuck on securely, the job is done.
For extra peace of mind, you can inflate the tube before inserting it back into the tyre to test that it can hold pressure.
Make sure the tyre is deflated and then fit it onto the tyre, before securing the tyre on the wheel. Inflate the inner tube to the recommended tyre pressure.

GCN's Essential Road Bike Maintenance
For road, gravel, commuter and hybrid bikes, Essential Road Bike Maintenance is intended to be a proper bible to all those essential bike maintenance, repairs, and set-up tasks that we all need to know. Everything from basic bike set-up, how to get your wheels on and off, through setting up gears, bleeding brakes, and beyond to things like installing electronic gears, converting to a 1x transmission and more. In a nutshell, pretty much everything you would want to tackle on your bike (or bikes, plural) yourself. And then some. Like bike set up tips for taller and shorter riders; bottom bracket standards explained; common bike maintenance mistakes and how to avoid them; essential roadside fixes to keep you riding; how to make your bike more comfortable; how to puncture-proof your ride and much, much more. “A huge amount of knowledge, hacks, and know-how to help improve both your workshop skills and your ride” – Ollie Bridgewood, GCN Presenter Each chapter is structured with the tasks you’ll most likely need more of the time at the start (like how to adjust your gears, replacing brake pads, or changing a tyre), before running through to those that you’ll do much more infrequently (such as changing disc brake hoses, servicing a freehub or pedals, and so on). This also means that many of the tasks naturally ratchet up in difficulty as you go through each chapter which should also mirror your natural progression as you become more mechanically capable and confident. In short, 260 pages packed with all the essential knowledge you’ll need to confidently take on and complete pretty much any bike maintenance task. Get Some ‘Show-How’ With Your ‘Know-How’ Each walkthrough is linked to a companion video which you can watch for free from your computer, tablet or smartphone. To watch, either type in the walkthrough’s short-link URL – e.g. https://gcn.eu/GetPerfectShifting – into your browser, or scan the QR code with your smartphone or tablet so you can get the best of both worlds: know-how and show-how. Simple. All you need to know to fix your bike. Product Details: Pages: 260 (120sm) Size: 280mm (h) x 216mm (w) (portrait) Cover: Paperback Cover Finish: 300gsm, silk stock with anti-scuff matte laminate and spot UV gloss finish Please note: There may be some additional shipping charges for orders consisting of 2 or more books. However, our customer service team will contact you after you have placed the order to advise on delivery options. Click here to explore all GCN best selling books
.jpg?w=600&auto=format)
Related Content
How to fix a bicycle puncture
This is an essential skill for any cyclist. If you've got a punctured tube, don't bin it, fix it
How to change an inner tube
A fundamental skill for any cyclist, but one that lots of us don't quite get right. Check out our steps for the easiest and most efficient way to change a tube.

Intense interval blast: Hank's 15-minute indoor cycling workout
A short blast of 30-second sprints for burning calories and building muscle as quickly as possible
How to prevent numb hands when cycling
If you’ve ever felt your hands go numb while riding your bike, follow these simple tips to prevent it from happening