Bike set-up for ultra-endurance cycling: avoid injuries and boost comfort
Set-up and component choices have a big impact on efficiency and can prevent injuries during ultra-cycling events.
Tom Hallam-Gravells
Online Production Editor


© GCN
Fail to prepare, prepare to fail. If you’re targeting an ultra-endurance event or challenge, this is a mantra to live by.
This preparation will be heavily focussed on training, but there are other important factors to consider too, including bike set-up. Many riders have failed in their ultra-endurance endeavours due to injuries caused by an ill-fitting or poorly set up bike.
Once a small niggle emerges, it’s often too late to correct the issue, so it’s important to perfect the set-up prior to setting out on an ultra-endurance ride.
How do you correctly set up a bike for ultra-endurance cycling? Here are some of our top tips.
Pedalling technique and efficiency
Cycling is a repetitive activity, recruiting specific muscle groups and joints, with the glutes, quadriceps and hamstrings picking up most of the slack. The repetitive nature of cycling can lead to wear-and-tear injuries if a bike isn’t set up correctly and the mechanisms of the pedal stroke become inefficient or unbalanced.
If your bike is set up incorrectly, but you only ride semi-regularly, you may only experience mild discomfort. For longer ultra-endurance rides, this will often materialise into more pronounced discomfort or pain, something that can be hard to overcome.
The perfect pedal stroke should be smooth and flowing with the legs pumping up and down like pistons. A poorly-fitting bike will interrupt this technique, leading to bad habits like rocking the hips if the saddle is too high. That’s when injuries and general efficiency can become a problem.
There are three main contact areas between a rider and a bike: the cleats/shoes, saddle and cockpit. The first two are the most important when it comes to pedalling technique, while the correct cockpit set-up will also boost general comfort.
Stiff shoes
Most riders automatically focus on their saddle when changing a bike’s set-up, while cleats and shoes are often overlooked, despite arguably being the most important factors.
All of the power you put through the bike goes through your feet, so they need to be supported. If they’re not, it could lead to issues with both your feet and knees, plus it’s simply inefficient, something you want to avoid on long rides when energy resources are at a premium.
Averting any issues involves finding a shoe which offers the right combination of support and comfort. Support is the most important part of the equation which means using a stiff sole, otherwise your foot will flex while pedalling which will quickly cause discomfort. If you’re struggling to find shoes with good support, try custom insoles.
If your knee position goes inwards or the position of your knees becomes asymmetrical under strain, you may need stiffer shoes or insoles
Cleat position
Like many parts on a bike, the ideal cleat position will vary per rider, but it’s best to start from a neutral position with the cleat in the middle of the shoe and move it laterally if required. Only make minor changes at a time, shifting the cleat by millimetres. It’s only a small amount but it can have big implications, especially if you get it wrong. Go to extremes and your toes will start pointing inwards or outwards which will soon cause problems.
Vertically, the cleats should be placed further back as this reduces leverage at the ankles. Whichever position you settle on, the balls of your feet should always be over the pedal axle.
Check out our guide to fitting cleats here.
Saddle height
Your saddle height shouldn’t alter from the regular position you use for any other type of riding, and you can use the below video guide to find the correct saddle height.
Saddle setback also has a big influence on both pedalling technique and comfort. Setback, also referred to as saddle fore-aft, is the distance between the centre of the bottom bracket and the front of the saddle. More simply, it’s the position of the saddle on the rails which has a big effect on weight distribution.
When a saddle is too far backwards it places extra stress on the hamstrings and glutes and can decrease stability in the ankles and feet as you overstretch for the pedals. Many riders now choose to have their saddle more forward to open up the hip joints, but this places extra load on the upper body and, in some cases, quads.
Unlike saddle height, there isn’t an easy trick to finding the right fore-aft position, so it’s best to start with the saddle clamped in the middle of the rails and experiment from there. Only change the position by millimetres at a time as small changes can make a big difference.
Other endurance set-up tips
Cockpit: don’t go too aggressive
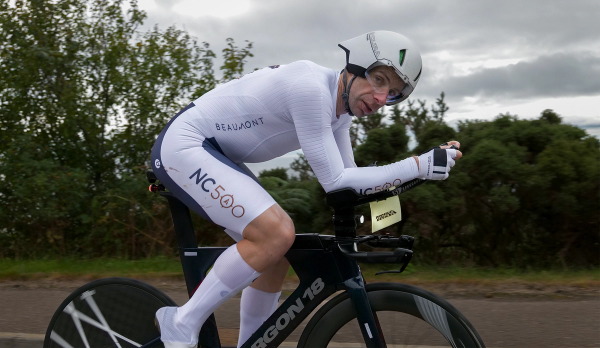
Bikes put our bodies in unnatural positions, placing particular strain on our necks. That’s why the cockpit on endurance bikes should be set up to alleviate some of this stress, usually through additional stack height and a shorter reach. This will result in a less aggressive riding position. Stack height can be increased using spacers while a shorter stem will reduce the reach.
Always avoid going for a race-orientated, aggressive position.

© GCN
Make sure your cockpit set-up isn't too aggressive.
Double-tape the handlebars
While some cyclists are blessed with smooth tarmac, many are tortured by rugged roads. The road buzz from rough surfaces can lead to numb hands and discomfort, so double-tape your handlebars to try and dampen some of this buzz. Some bar types are designed with extra padding and these could be a good option if you struggle with hand discomfort.
Pick the right gears
Avoid over-gearing at all costs. You’ll appreciate smaller gearing when you’re deep into your event and facing a leg-sapping climb.
As a general rule, we’d recommend using a compact chainset with 50/34 chainrings or smaller. The chainring and cassette combo you opt for should also reflect the terrain you’ll tackle.
Remember, it’s better to spin a high cadence in an easier gear than it is to grind out a harder gear which puts more strain on your joints, especially during an ultra-endurance event
For more endurance cycling tips, check out our Endurance: How To Cycle Further By Mark Beaumont book.
Head over to our tech section for all the latest news, guides and features.


.jpg?w=600&auto=format)
Related Content
Long distance cycling tips from Mark Beaumont
Advice and pointers from an ultra-endurance world record holder
The ultimate bike van: Modified VW Crafter
With a carefully designed living space and storage for four bikes, is this the best bike van available?
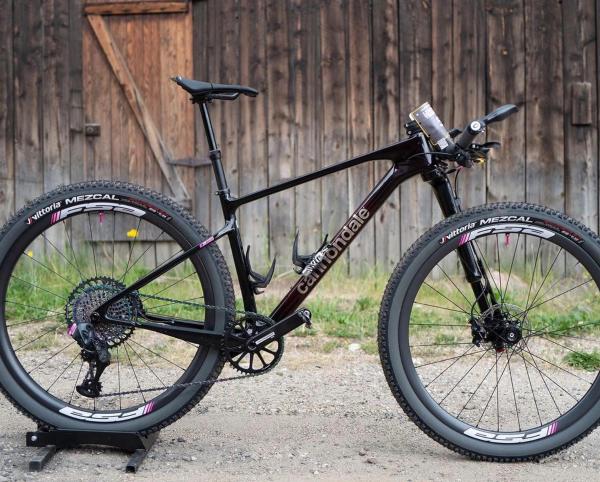
Leadville 100: Lachlan Morton goes beyond slammed
Lachlan Morton's bike set-up for Leadville 100 was anything but usual with an ultra-slammed stem

Inside the Pirelli factory: How are top-end bike tyres made?
Ollie Bridgewood visits Pirelli’s HQ in Italy to see the tech that goes into a performance road tyre