Difficulty
Easy
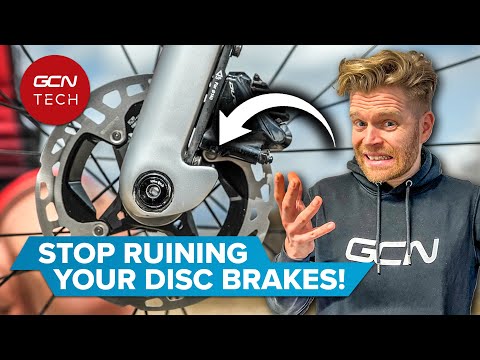
How to adjust cable-actuated disc brakes
From rubbing brakes pads to spongy braking, here’s how to adjust cable disc brakes
Tom Hallam-Gravells
Online Production Editor

Alex Paton
GCN Tech Presenter
Impressive sprinter - quite possibly the fastest member of the GCN team
Cable-actuated disc brakes have become a rare sight on modern road bikes. They’re now usually reserved for entry-level bikes with anything higher up the pyramid benefitting from the better performance of hydraulic brakes.
While they can’t match hydraulic levels of performance, cable disc brakes have their benefits, most notably being easier to adjust. In this guide we’ll take you through the process. All you will need is a set of allen keys.
How to Steps
Adjusting brake pad position
Check the position of the right-hand brake pad
Use spacer to adjust brake pad position
Adjust the calliper position
Loosen the calliper bolts
Pull the lever and tighten bolts
Reduce play in brake lever
Loosen the pinch bolt
Pull down on the cable
Alter tension with barrel adjuster
Tools Needed

Step 1A
Adjusting brake pad position
Many cable-actuated braking systems use a single-pivot system. Only one pad moves while the other is stuck in a fixed position. If the static pad isn’t adjusted correctly, it will rub against the disc rotor or it can lead to spongy braking if positioned too far from the rotor.

Step 1B
Check the position of the right-hand brake pad
The static pad is usually the one closest to the bike. Visually check its position in relation to the disc rotor. It needs to be positioned as closely to the disc rotor as possible without touching it.

Step 1C
Use spacer to adjust brake pad position
Adjust the inside pad if necessary. It can be adjusted using a spacer on the bike-facing side of the calliper.
Use an allen key to turn it clockwise to move the pad towards the rotor or anti-clockwise to move it away. Make sure it is positioned as close as possible to the rotor without touching it.

Step 2A
Adjust the calliper position
If the brake pad is still rubbing against the rotor after adjusting its position, it may be because the calliper isn’t positioned correctly on the frame.
This can be easily adjusted.

Step 2B
Loosen the calliper bolts
Partially unscrew the calliper bolts so that the calliper can be moved.

Step 2C
Pull the lever and tighten bolts
Pull the brake lever. When the brake pads press against the rotor, they will pull the calliper into the correct position.
While continuing to tightly hold the lever, tighten the calliper bolts back up to the recommended torque limit.

Step 3A
Reduce play in brake lever
If you need to pull the lever a long way before the pad makes contact with the rotor, you need to adjust the cable tension. Here's how.

Step 3B
Loosen the pinch bolt
Use a hex key or Allen key to loosen the pinch bolt that connects the cable to the calliper. You don't need to completely unscrew it, it only needs to be loose enough for you to pull the cable through the clamp.

Step 3C
Pull down on the cable
Use one hand to pull the cable down, ensuring it is as tense as possible, and then tighten the bolt with your other hand. Don’t exceed the recommended torque limit when tightening the bolt.
Top Tip
When correctly set up, a brake lever should have a little play, but not so much that you can easily pull it back to the handlebars.

Step 4
Alter tension with barrel adjuster
Make final adjustments with the barrel adjuster on top of the calliper. As the pad wears down with use, you'll need to use the barrel adjuster to adjust the cable tension accordingly. The more the pad wears down, the more you'll need to extend the barrel adjuster.
Turn the barrel adjuster until you find the correct tension. You only need to do this in small increments. Pull the brake lever each time to check. Once correct, there should still be a little play in the lever, but not too much.
.jpg?w=600&auto=format)
Related Content
Seven common disc brake mistakes to avoid
Save time, money and stress by avoiding these common issues

The full pyramid: 30-minute HIIT indoor cycling workout from GCN
A 30-minute HIIT workout for developing anaerobic fitness, led by Manon Lloyd

How to replace a gear cable on a road bike
A new gear cable can reduce friction and improve shifting. Here’s how to change a gear cable on a road bike

How to wax a bike chain
Waxing a chain is more complicated than applying lube but it's worth the extra effort