Difficulty
Very Easy
How to maintain a waxed bike chain
It's important to keep a waxed chain in tip-top condition – here's how
Tom Hallam-Gravells
Online Production Editor


A hot melt wax treatment is the best way to maximise drivetrain longevity and efficiency. However, the treatment won’t last forever. To maintain those performance gains, you’ll need to regularly maintain your chain.
Doing so is quick and easy and all you’ll need is a microfibre cloth and some drip-on wax.
When does a chain need maintenance?
The answer to this will depend on the type of conditions you ride in and the distances you cover. As a general rule, a wax melt treatment will last around 300km, although this will be shorter when riding in the rain as wax is water soluble. It may last longer in drier conditions.
The clearest indication that a chain needs maintenance is if it has become noisier than it was previously, at which point it requires a clean and additional lubrication.
Don’t ignore these noises for too long as an unkept chain will wear faster and cause other components in the drivetrain to wear faster too.
Full wax treatment vs drip-on wax
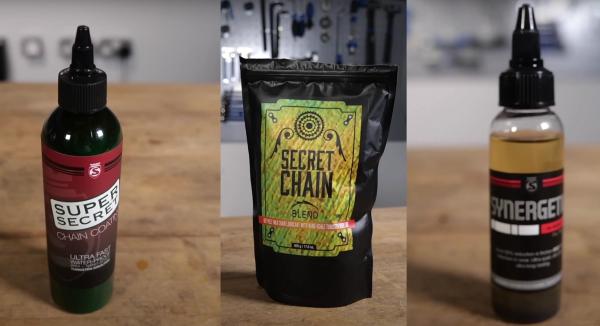
Once your chain is making the tell-tale noise, you have two options: another full hot melt wax treatment or drip-on wax.
A full treatment is the most thorough method, boosting efficiency and longevity as it’ll ensure that the wax permeates deep into the chain. However, it does take a little longer and the gains aren’t usually significant enough to warrant the effort – according to Silca’s Josh Poertner, a full treatment only saves 0.3 to 0.4 watts over a drip-on wax.
That leads us neatly onto drip-on wax, which is the easiest method and is the one Ollie Bridgewood covers in the guide below. Drip-on waxes are usually water-based and the water carrier needs time to evaporate, so it’s best to complete this the day before a ride.
If your chain has been contaminated with a wet lube or something similar, you will need to complete a full treatment. You can learn how to do that in our guide, linked here.

Step 1
Clean the chain with a microfibre cloth
Turn the drive-side pedal to move the drivetrain and run the chain through a microfibre cloth.
This will remove any dust, dirt or contamination that’s on the surface of the chain. If you don’t complete this step, the wax will draw dirt deep into the chain, potentially accelerating wear and impacting efficiency.

Step 2
Apply the drip-on wax
Move the chain into the largest chainring and the largest sprocket on the cassette. This will stretch the chain, allowing the wax to permeate deeper into the links and rollers.
Give the bottle of wax a shake. Turn the drive-side pedal backwards and work your way along the chain, applying a drop or two of the wax to each link. Don’t apply too much wax as this can be detrimental to performance.

Step 3
Turn the cranks to spread the wax
Once you’ve applied the wax, pedal the chain backwards for five revolutions. This will allow the wax to dissipate and permeate into as much of the chain as possible. Then pedal it forwards for five revolutions.
Remember to leave the wax before riding your bike to give the water time to evaporate. If you’re in a warmer climate this shouldn’t take too long, but may take overnight in colder temperatures.
.jpg?w=600&auto=format)
Related Content
Silca CEO shares his secrets on the best ways to wax your chain
Josh Poertner also talks us through his predictions for the future of bike design, marginal gains, and where he sees the industry heading in the next 12 months
Easy and effective on-the-bike chain cleaning
The fastest way to clean your chain and drivetrain
The most efficient way to deep clean your bike chain
Removing your chain might seem like a lot of effort, but it's actually a time saver

Team time trial: 20-minute HIIT indoor cycling workout
This HIIT spin bike workout replicates the varied intensities of a team time trial effort